H10-76 Rebuild
David Clark aviation headsets are iconic. If someone puts on a vaguely military-looking headset in a movie, it probably resembles a David Clark. The company has been around since the last world war and still makes products like it's the 1970's and recurring revenue streams are just a bad dream. I've loved the aesthetic for a long time and recently decided to actually get one.
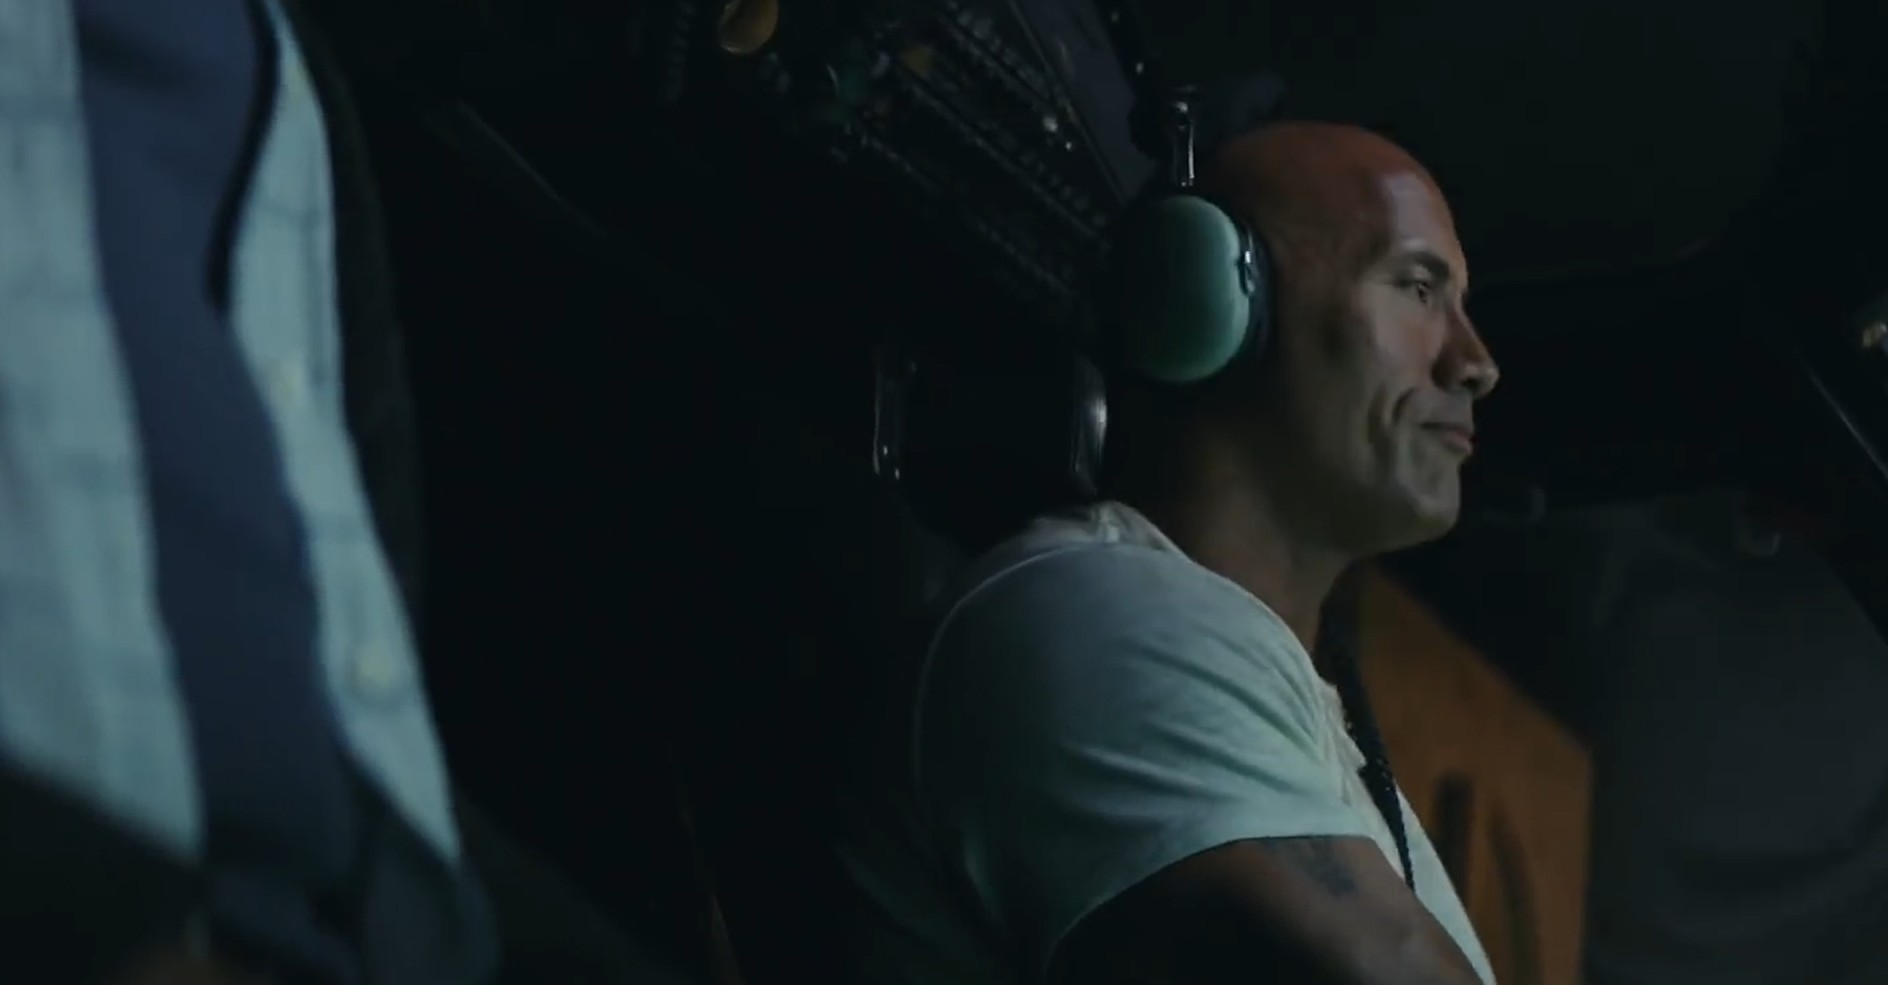
DC headset on Dwayne Johnson in the trailer for Rampage.
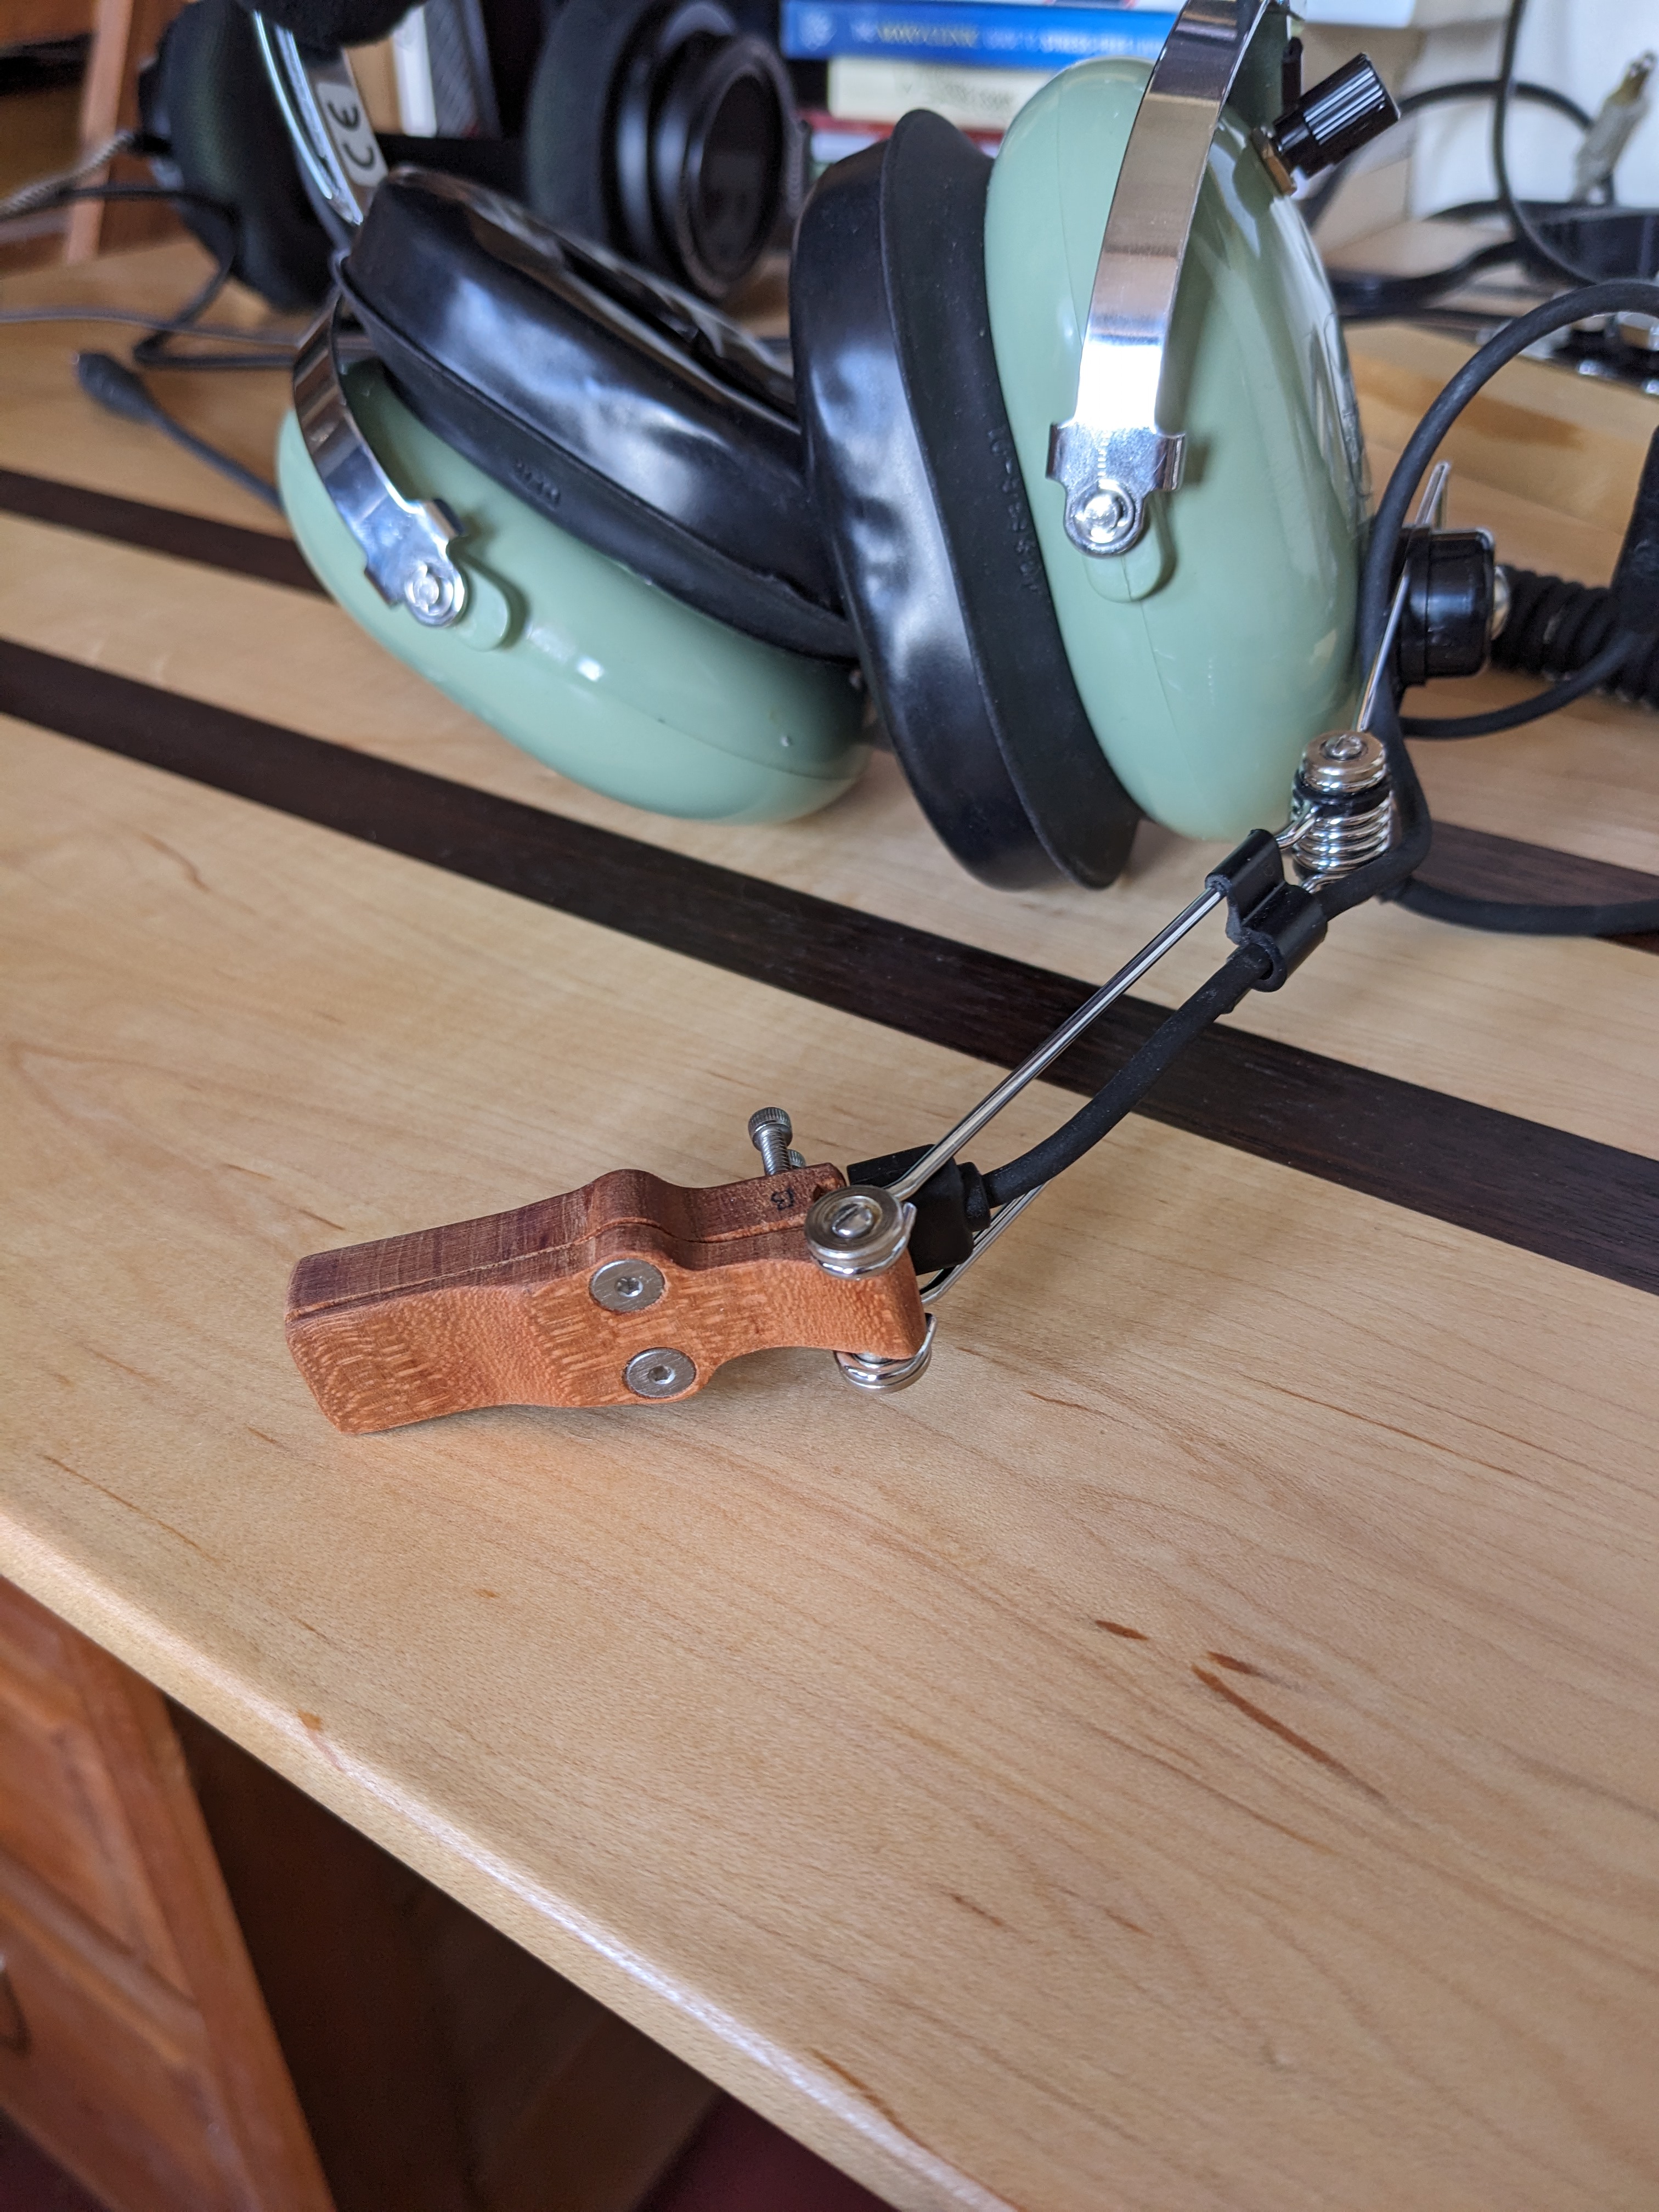
Now, DC actually makes modern computer-ready headsets. They have good speakers and microphones with impedance ranges for the ADC's you'll find in a PC these days. However, I very specifically love the way they used to do the microphone booms. It seems all of the modern PC-type headsets use a sort of flexible conduit type boom for the mic. It probably works just fine, but I much prefer the older method of using a wire-linkage mechanism with finite degrees of freedom.
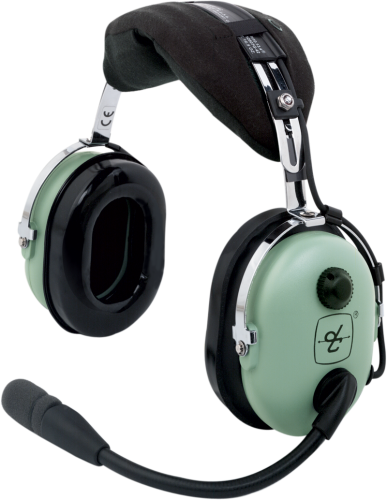
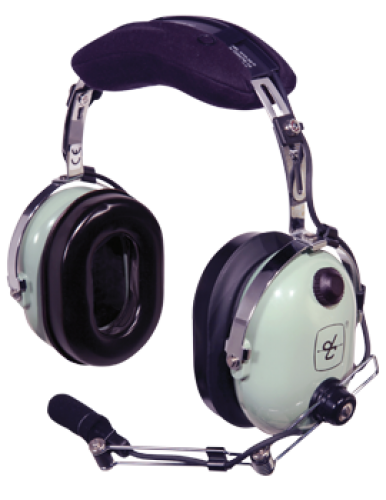
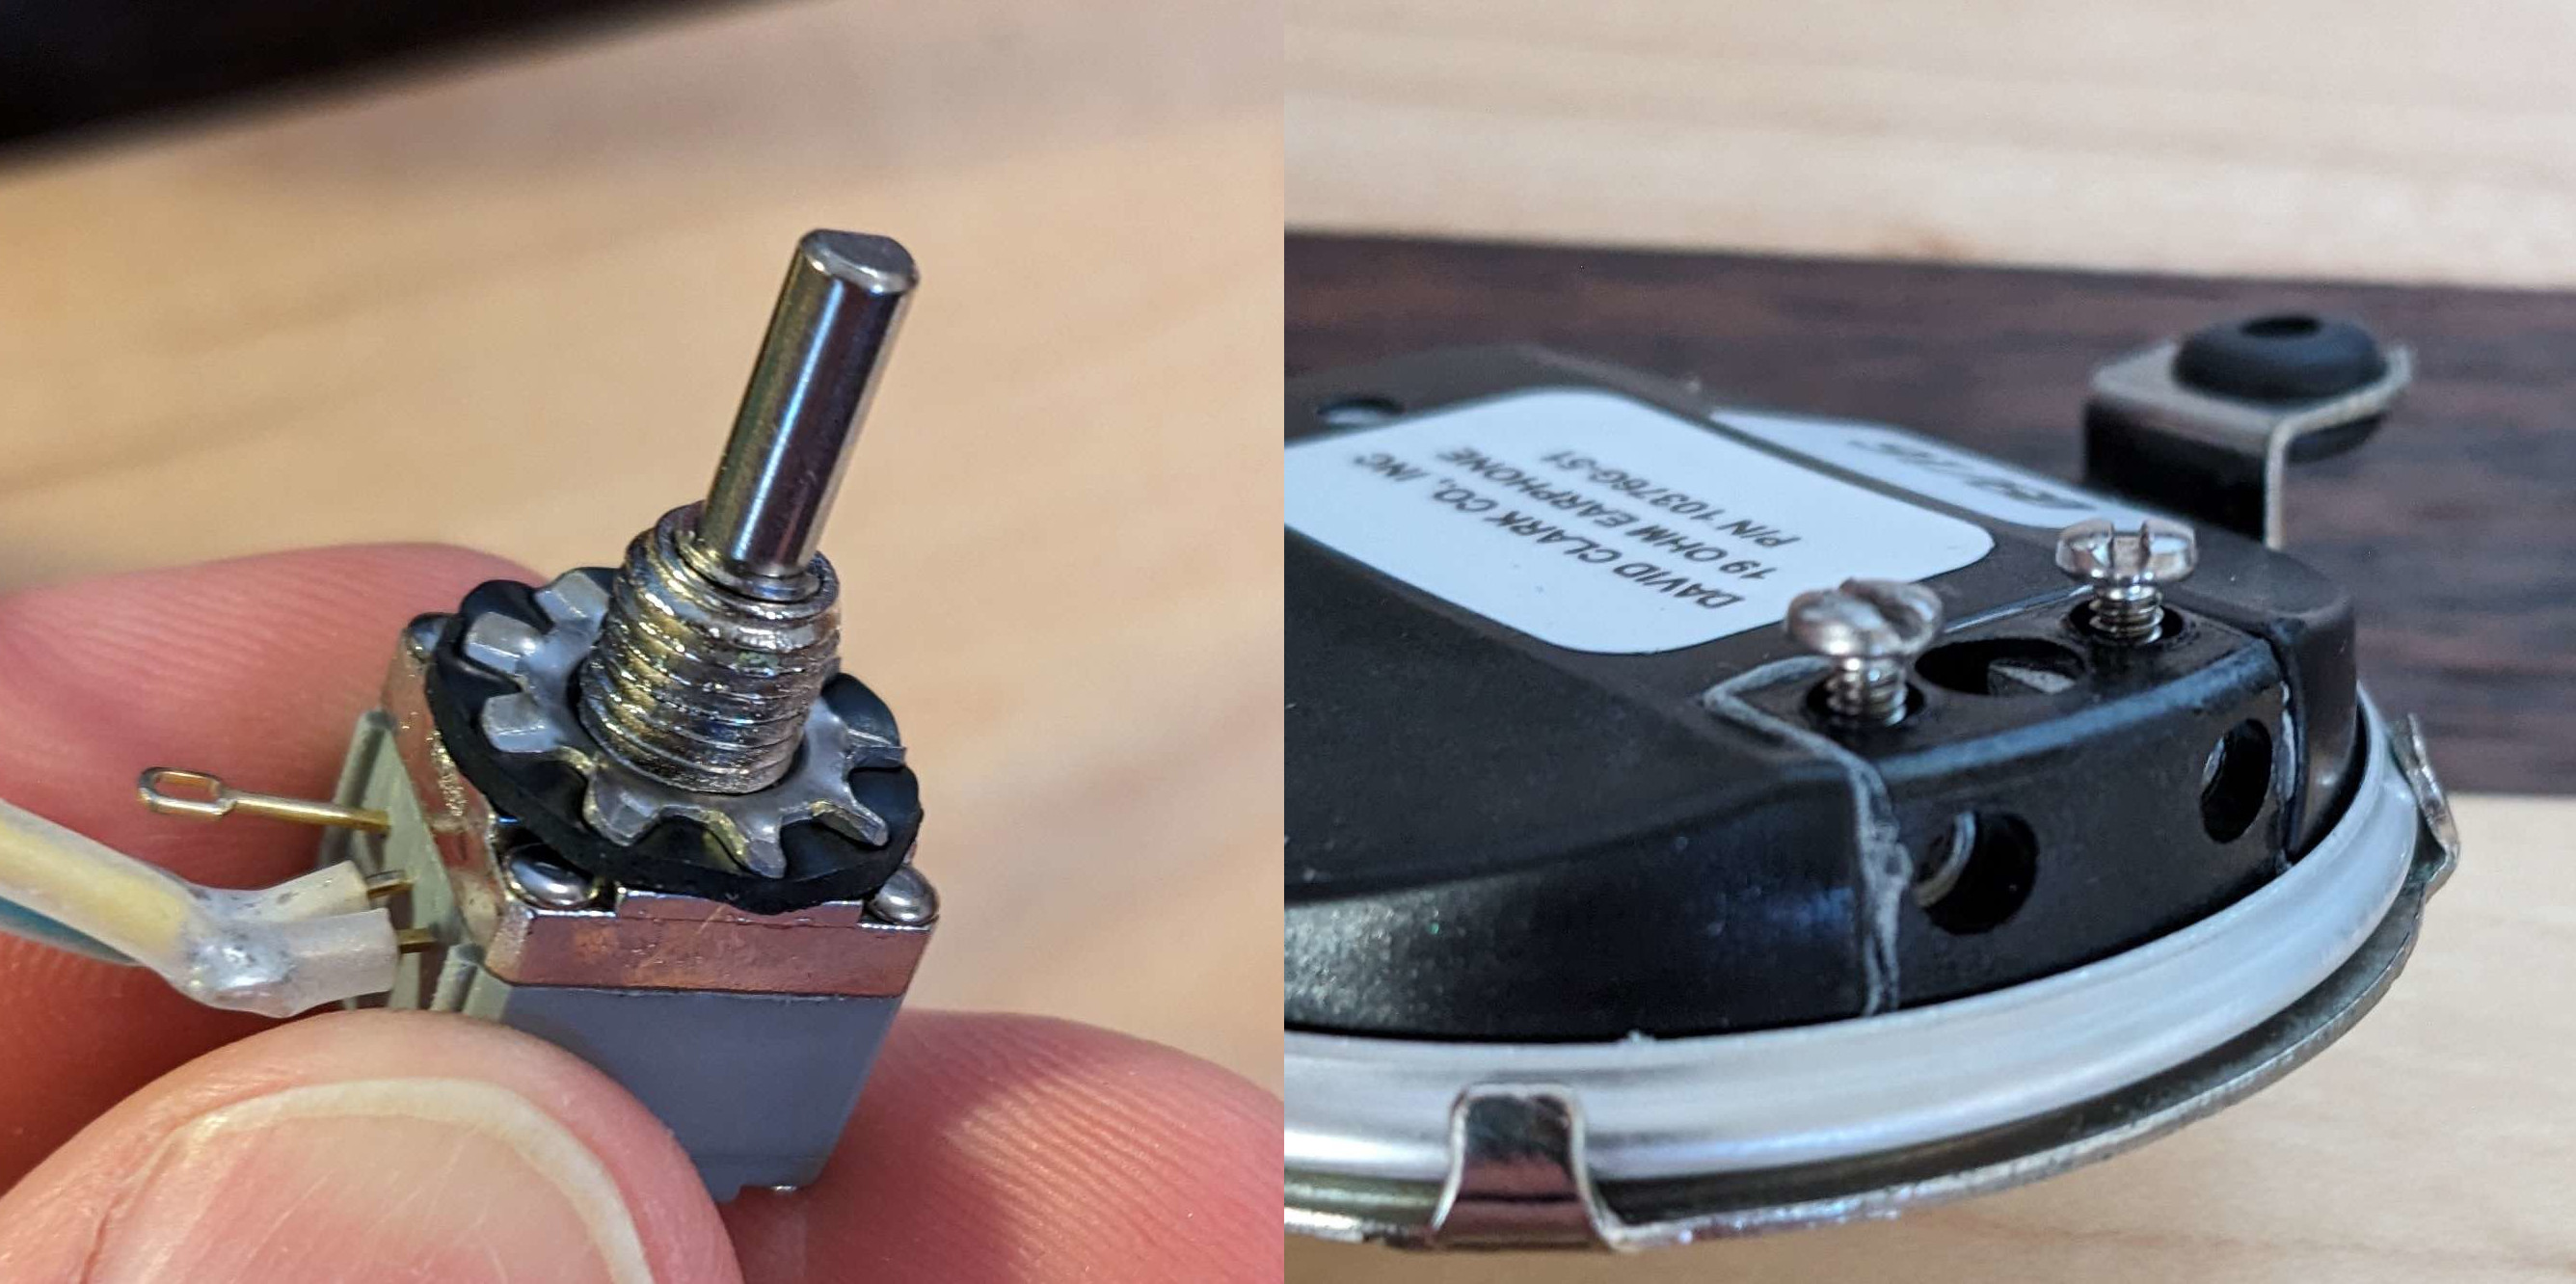
See the older, wire-mount style of mic on the right.
It seems very few headsets still manufactured have this mic. But DC's H10-76 is still in production, yet another rare sentinel in the modern world that declares "if it ain't broke, don't fix it". The datasheet for this headset dates to 2015, but I suspect that the design for this headset goes back decades and has changed very little. It features a U-174 connector! You know you're in deep when part numbers could have designated a boat that was chased around the Atlantic by Catalina's. Look at this bizarre coax!
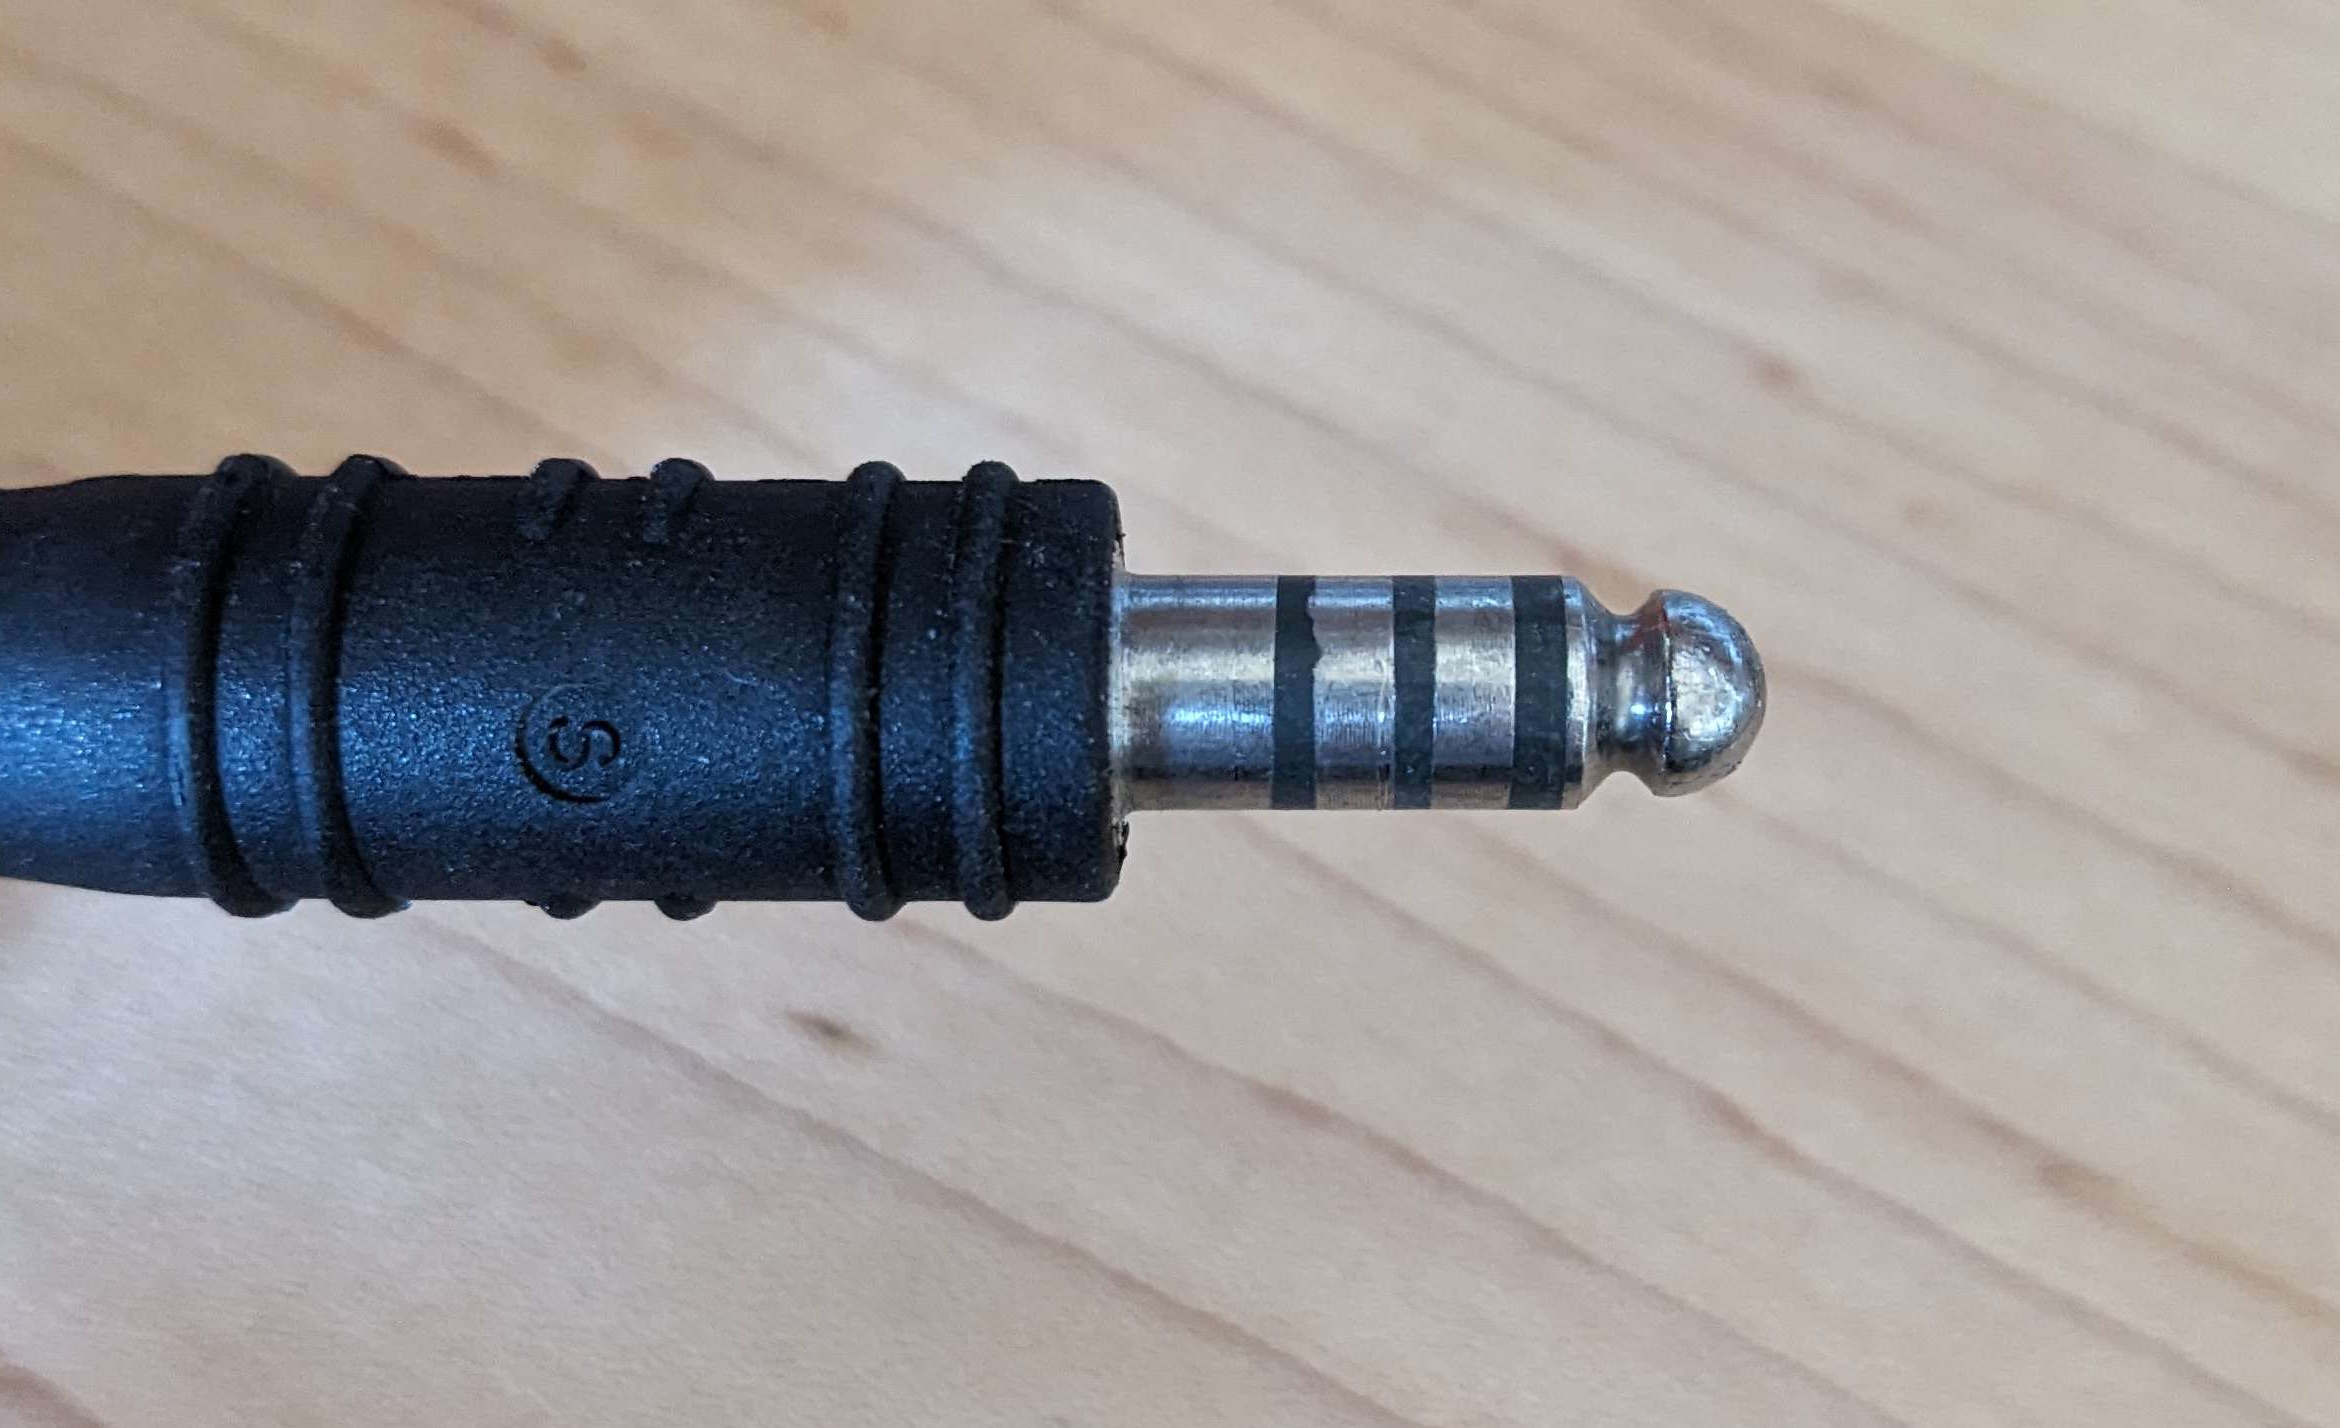
It's a four-channel 1/4" jack! Actually it's slightly fatter than a 1/4" jack, meaning that it fits almost nothing.
The headset is marketed as providing "clear, crisp communication in demanding environments" and is "built to withstand the rigors of the military aircraft cockpit". It has both the stamina and acoustic quality of a brick shithouse. It is meant to let a pilot hear the desperate communications of other pilots over the roar of engines, explosions, and screams. On the one hand, this is great as it means the headset has excellent noise damping. On the other hand, the default speakers and wiring are not designed to let you enjoy the more sensitive notes of Tchaikovsky's 5th.
The obvious solution is to rebuild the headset with differing components. The rest of this post describes my experiences and discoveries doing exactly that.
The H10-76 as a Platform
Fortunately, these headsets are perfect for modification. I can not stress how refreshing it is to work with such a product in 2025. Most modern electronics are not even meant to be disassembled and repaired, let alone modified. My current headset, for example, is entirely made of injection molded parts. The screws that hold it together bind directly into the plastic, meaning they will strip out after a few uses. The molded parts are honeycombed and ribbed to exhaustion to use the absolute minimum amount of plastic. The foam is glued into place and removing it would require re-gluing afterwards.
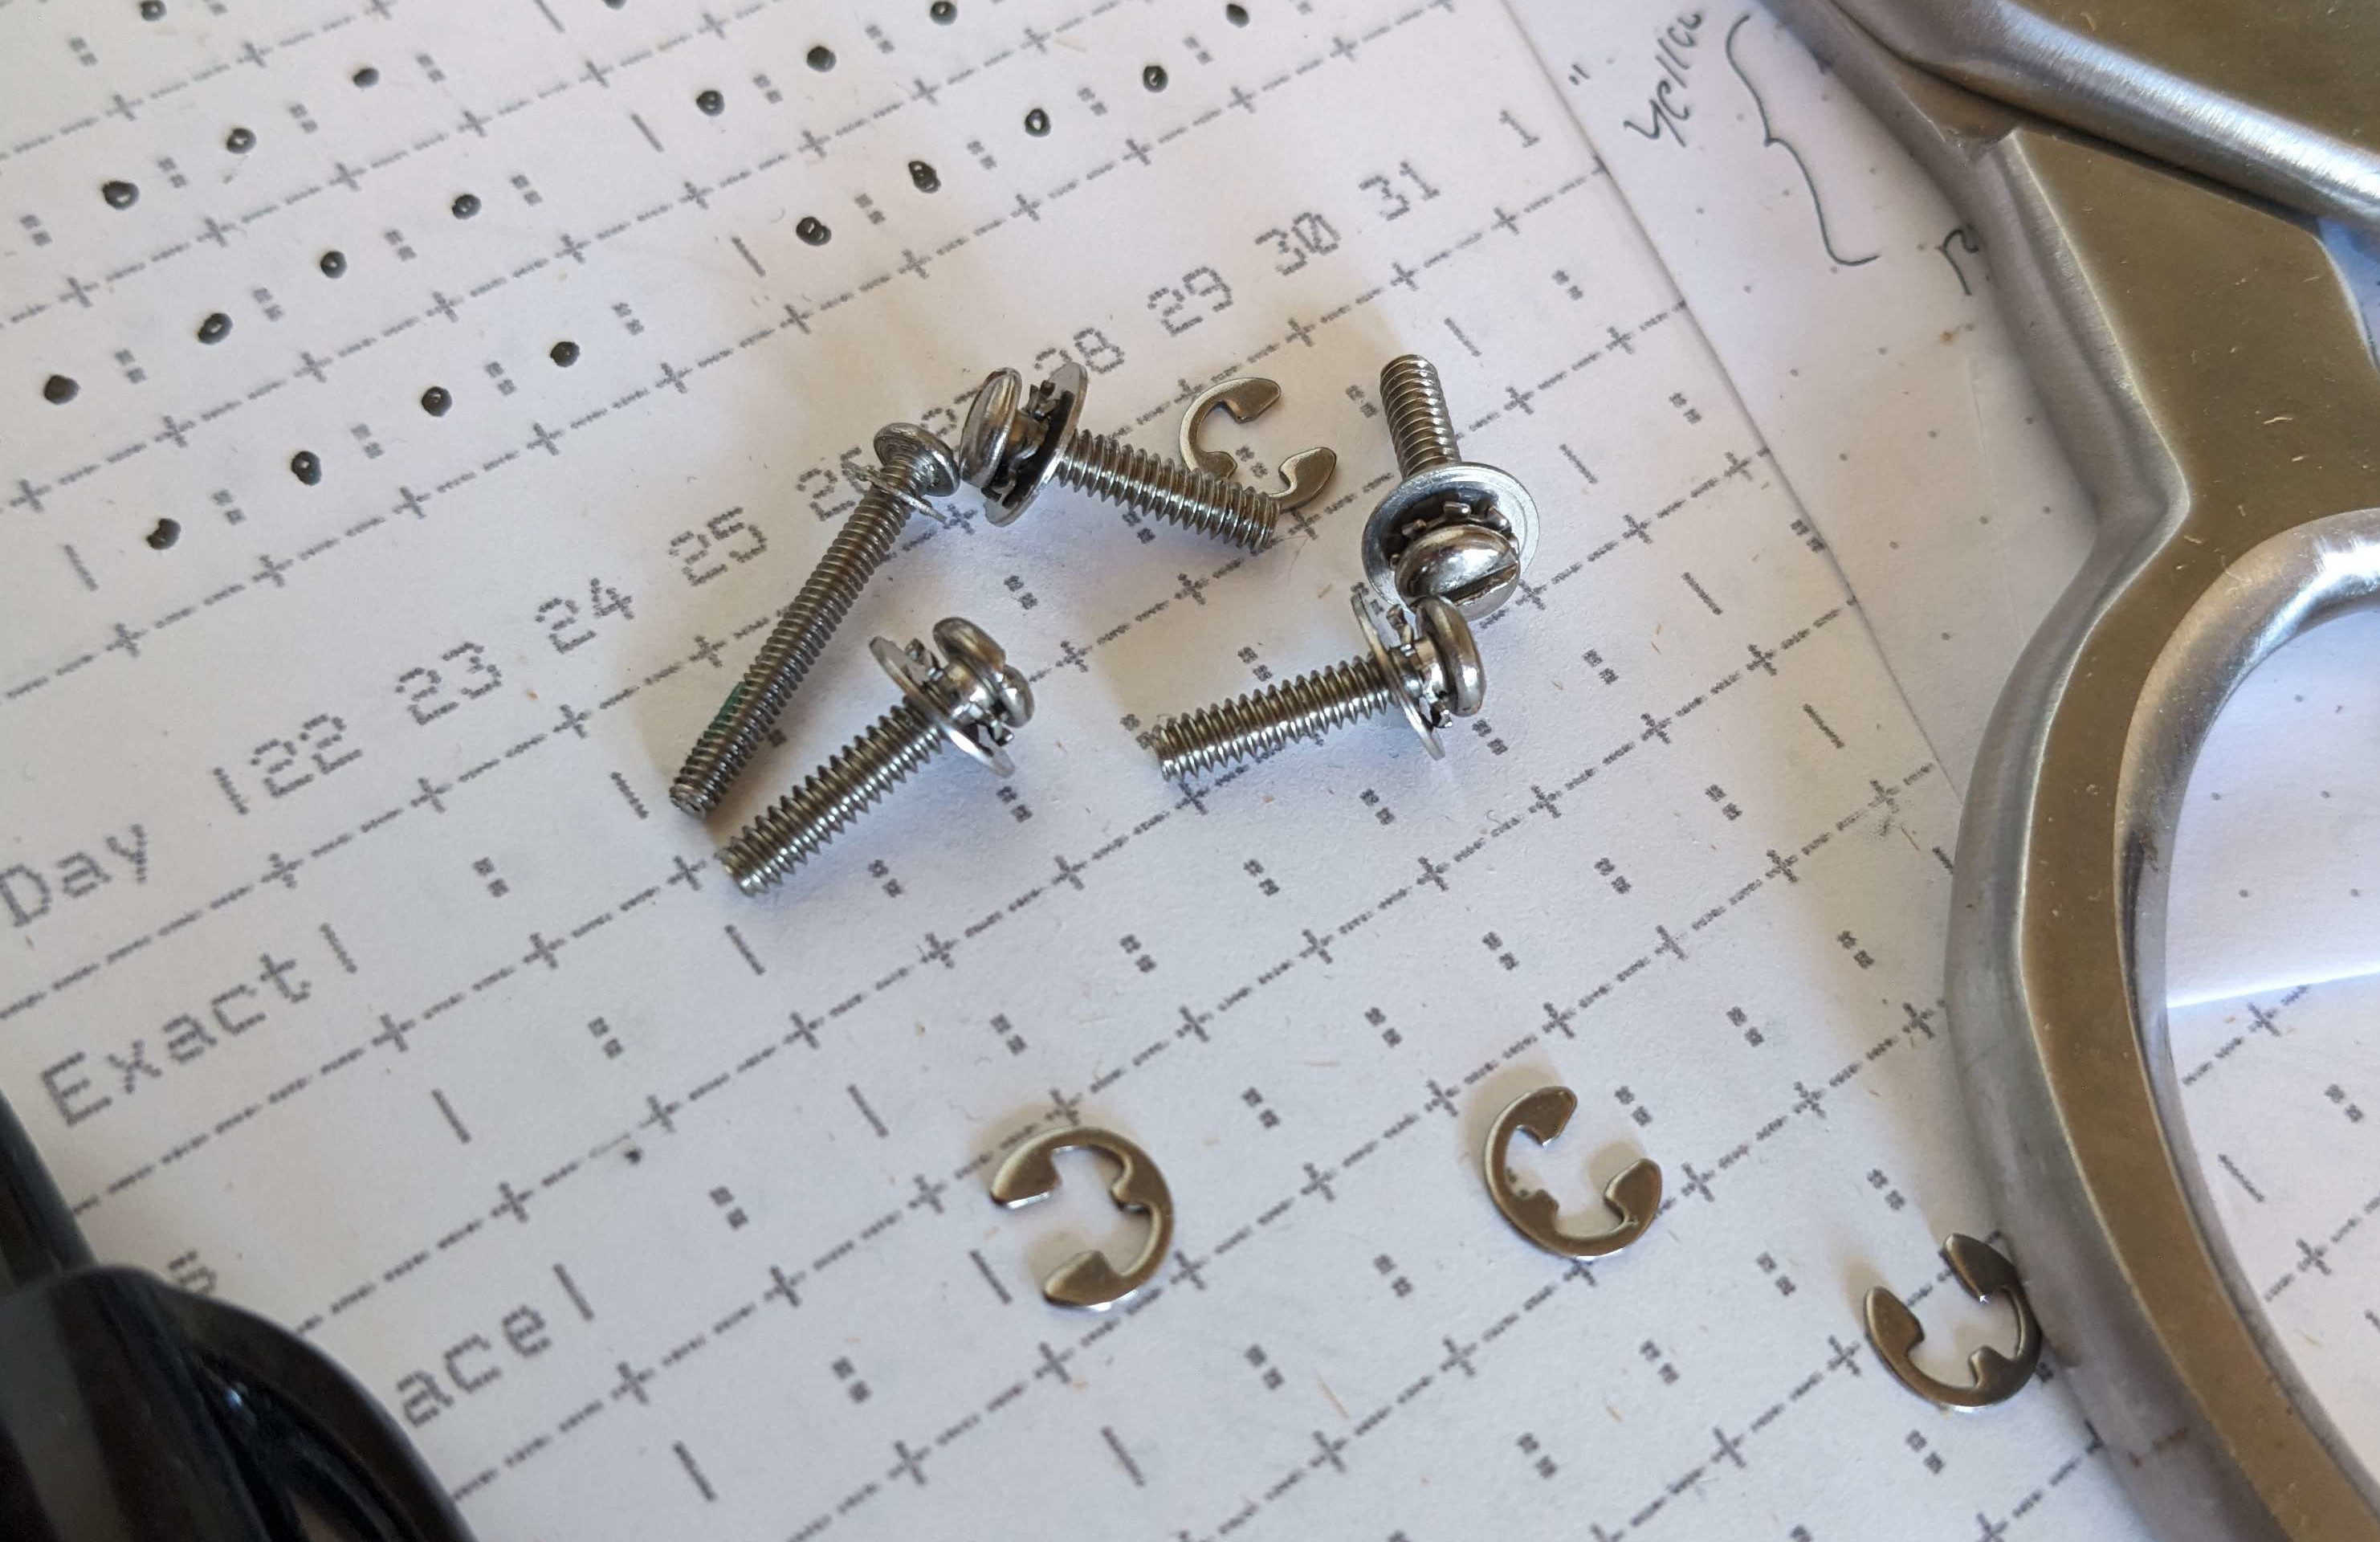
The H10-76's engineer indulged in no such foolishness. All mating parts are metal. Proper machine screws are used nearly everywhere. When they join to a plastic component, they screw into a metal threaded insert that has been heat-set into the ABS. Screws also feature an actual external toothed lockwasher, which is so rare in modern bean-counter manufacturing.
The main hinges pivot about an actual clevis pin with a little clip retaining rings. If I was to lose a little ring, I could reasonably source a new one on McMaster Carr.
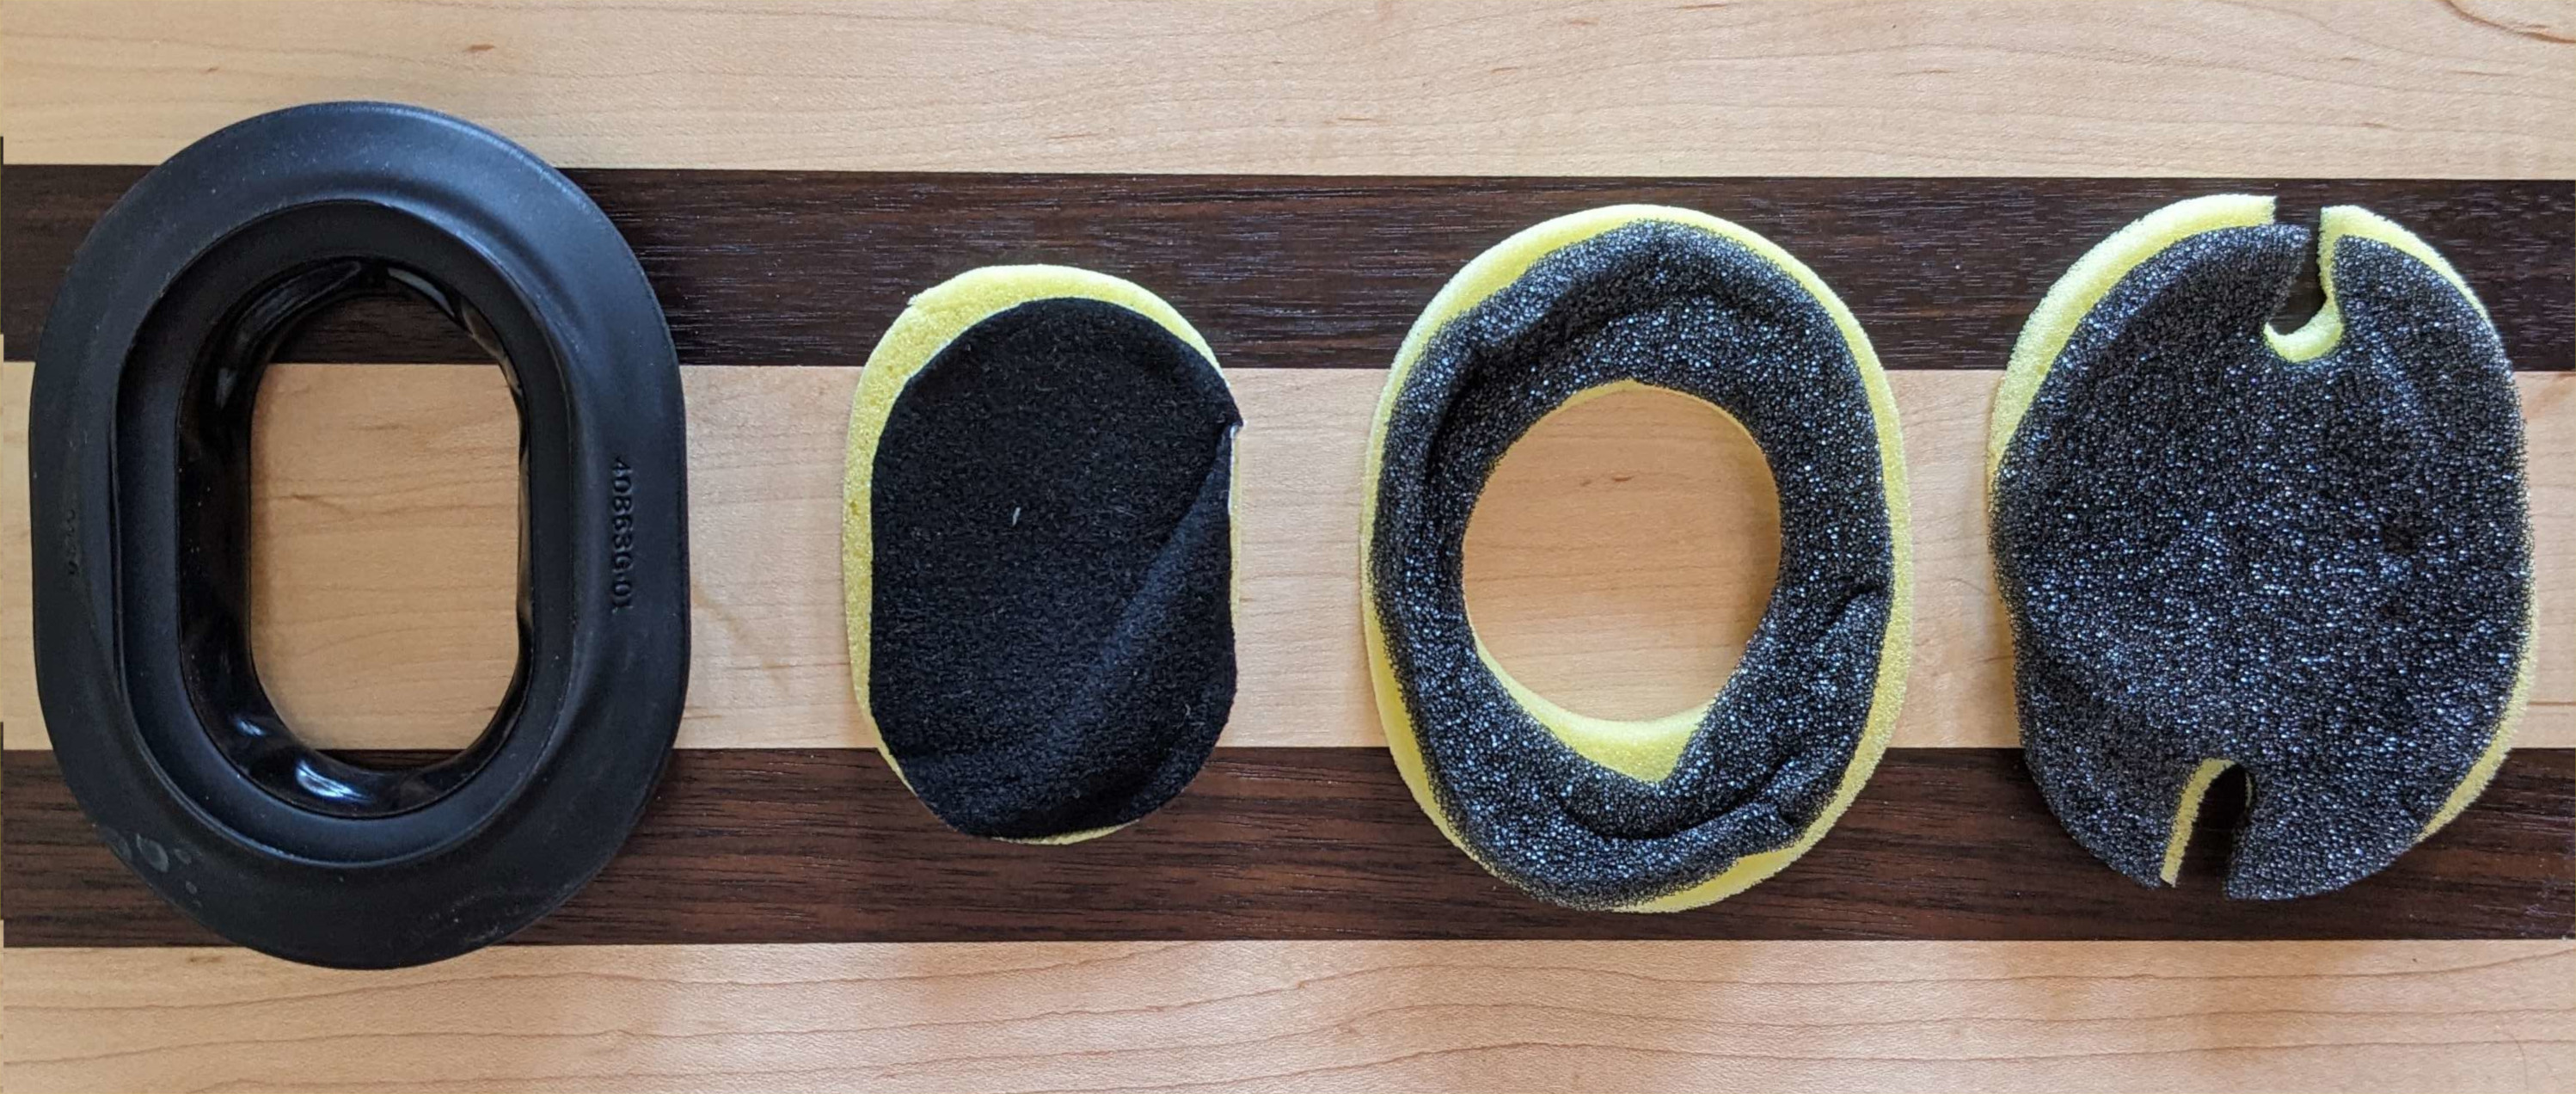
All the foam and rubber parts that form the over-ear seal cleverly nest into and around the ear cup. Taking them off took enough force that they'd never fall of on their own, but was simple and involved no adhesive so that putting them back on is simply an act of assembly.
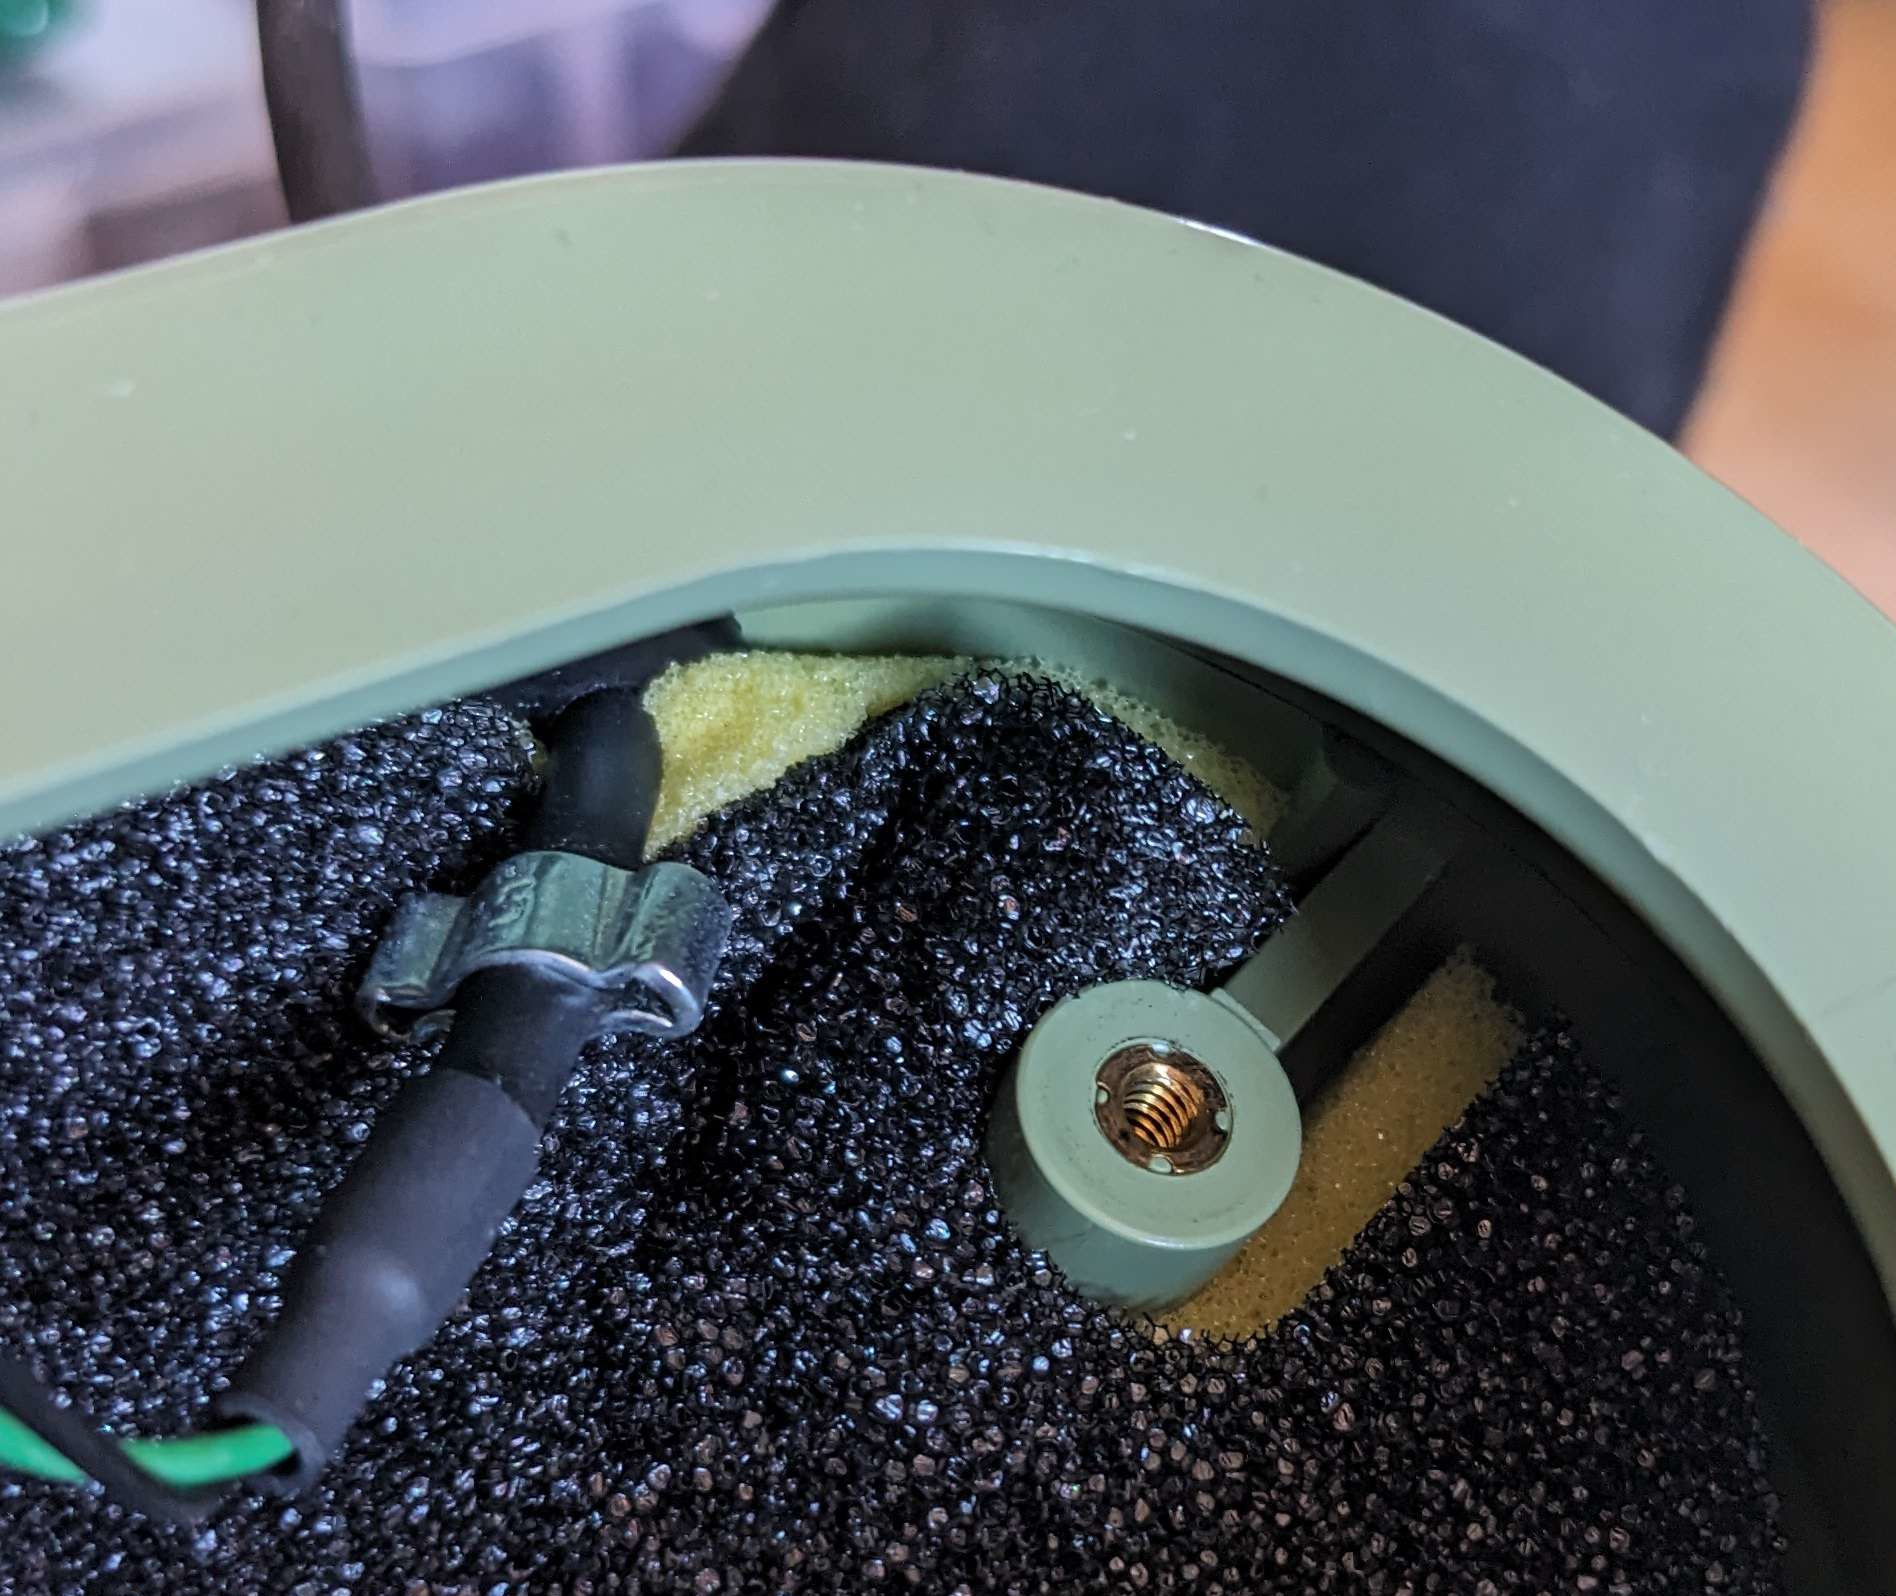
And best of all is the wiring. I was dreading having to rebuild the wiring harness within the headset, and it turns out the design features almost the same harness I'd have built to make modification easy. The wires have a clear and simple color scheme. There's enough slack within each ear-cup to perform work outside of the cup itself. The perforations that admit cables (e.g. from one ear to the other, out to the mic, &c) feature real rubber bushings that enable the cable-bundles to be pulled up into the cup for even better access and they feature a strong metal clip to prevent the cable from pulling out during operation.
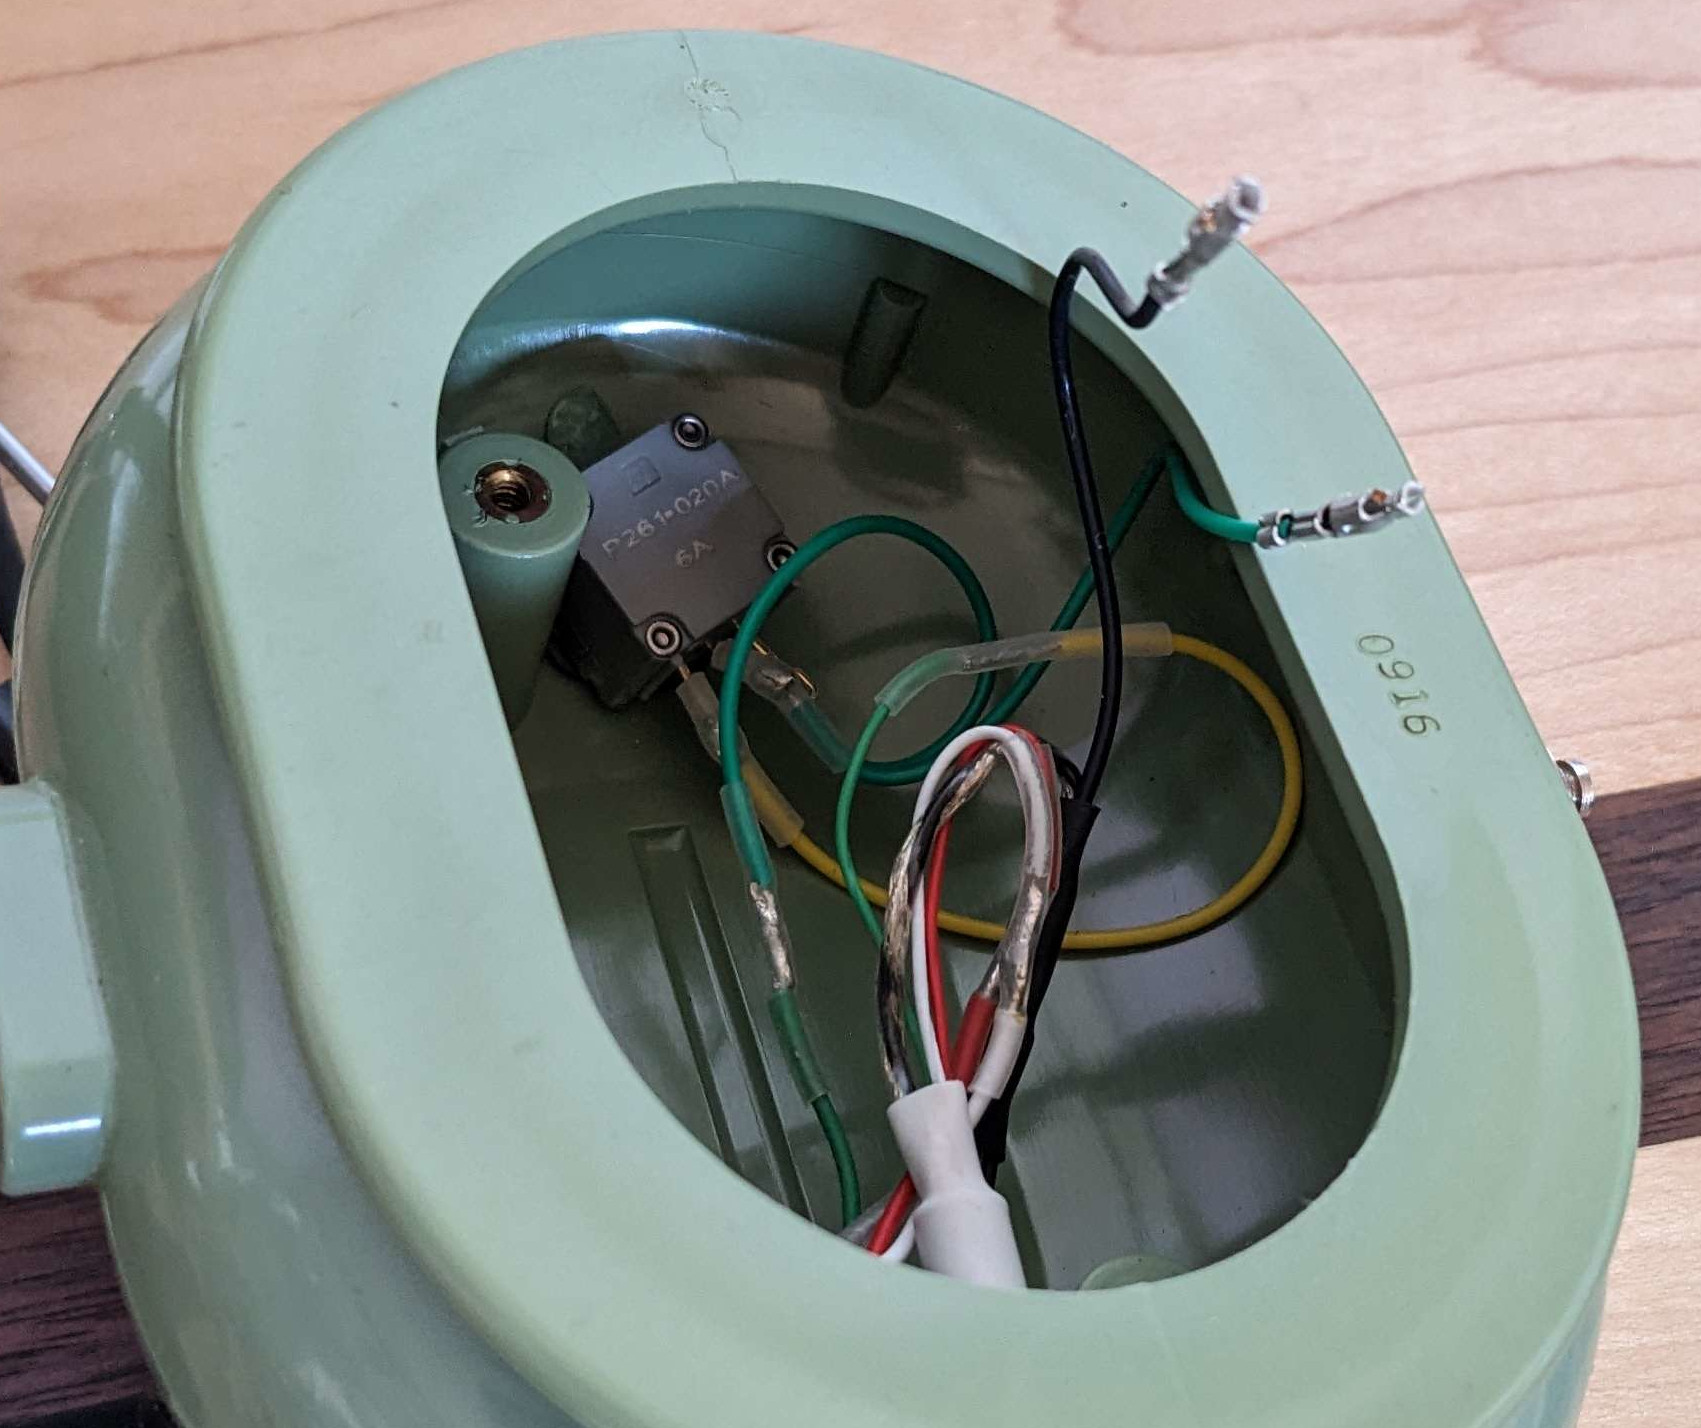
Even the components are a joy. The speakers have a built-in terminal block with little screws to clamp on the wires. Even the relatively nice new speakers I bought didn't include those! The little potentiometer that controls volume was easy to remove (e.g. the knob wasn't glued or press-fit on) itself was such a high quality part that it almost hurts to source a modern replacement with two distinct channels.
The H10-76 (and probably other DC headsets) is more than a headset - it is a platform. Any person wishing to build a custom headset would do well to start here. Modification is so easy and the assembly can be taken to parts and reassembled effectively an infinite number of times without wearing down any components. There's enough spare room in the ear cups for additional components, too (perhaps custom mic amp board or a low/high pass filter). Foam with different acoustic properties could be cut to go inside the cups. The only real downside to the headset is its noise-cancelling function - after all, these are meant to drown out noises in a military aircraft. They clamp firmly around the ears which can be uncomfortable for people with glasses and are not at all 'breathable'.
A New Design
So the goals of a redesign are:
- Convert from "balanced" to CTIA two-channel + mic (e.g. modern headset wiring).
- Drop in speakers more suited to a desktop environment.
- (Possibly) Switch out the microphone.
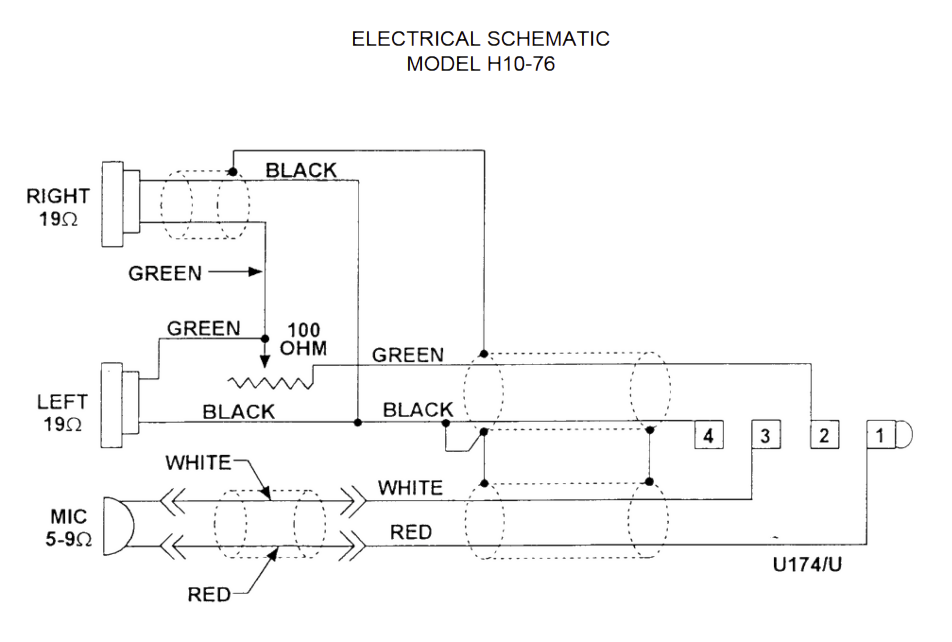
The original wiring schematic is above. It's quite simple: a loop connects terminals 2 and 4 across the speakers in parallel and a potentiometer in series. Another loop from terminals 1 and 3 links in the microphone. Shielding is achieved with the black cable, which is also presumed to be ground.
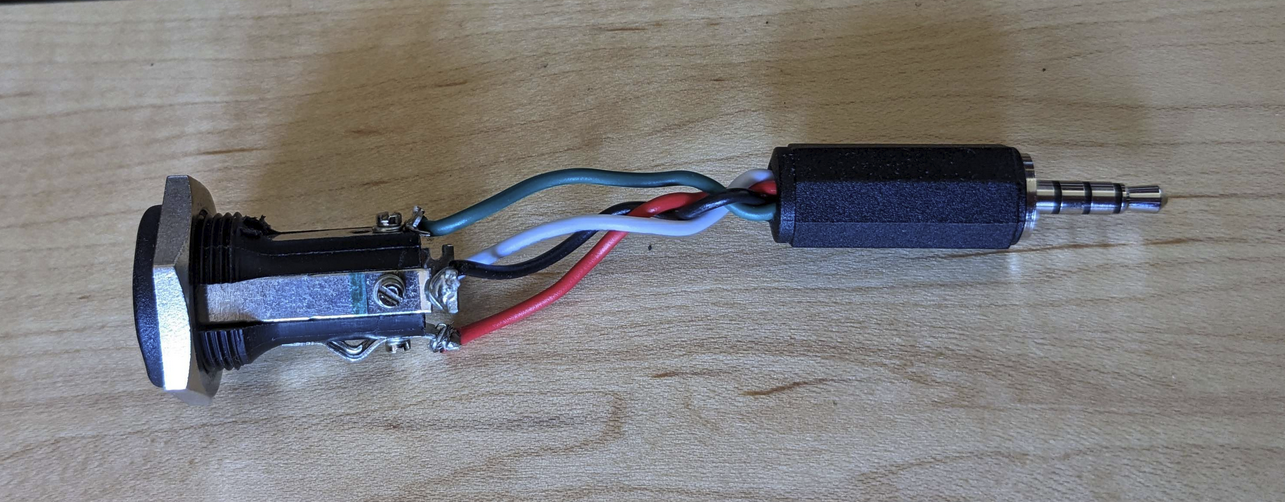
Switching to something a modern computer can more readily use involves both altering the general connections to speakers and doing something about that U-174 connector. I personally was so charmed by this incredibly odd coax that I did not remove it from mine; however I probably would not do it again. I could not even find a female U174 port off-the-shelf. The closest thing I did find seemed to have different axial positions of the TRRS rings and I had to mechanically modify the contact pin locations on the receptacle. Thank god the thing is enormous by electronics standards or I'd have had no chance!
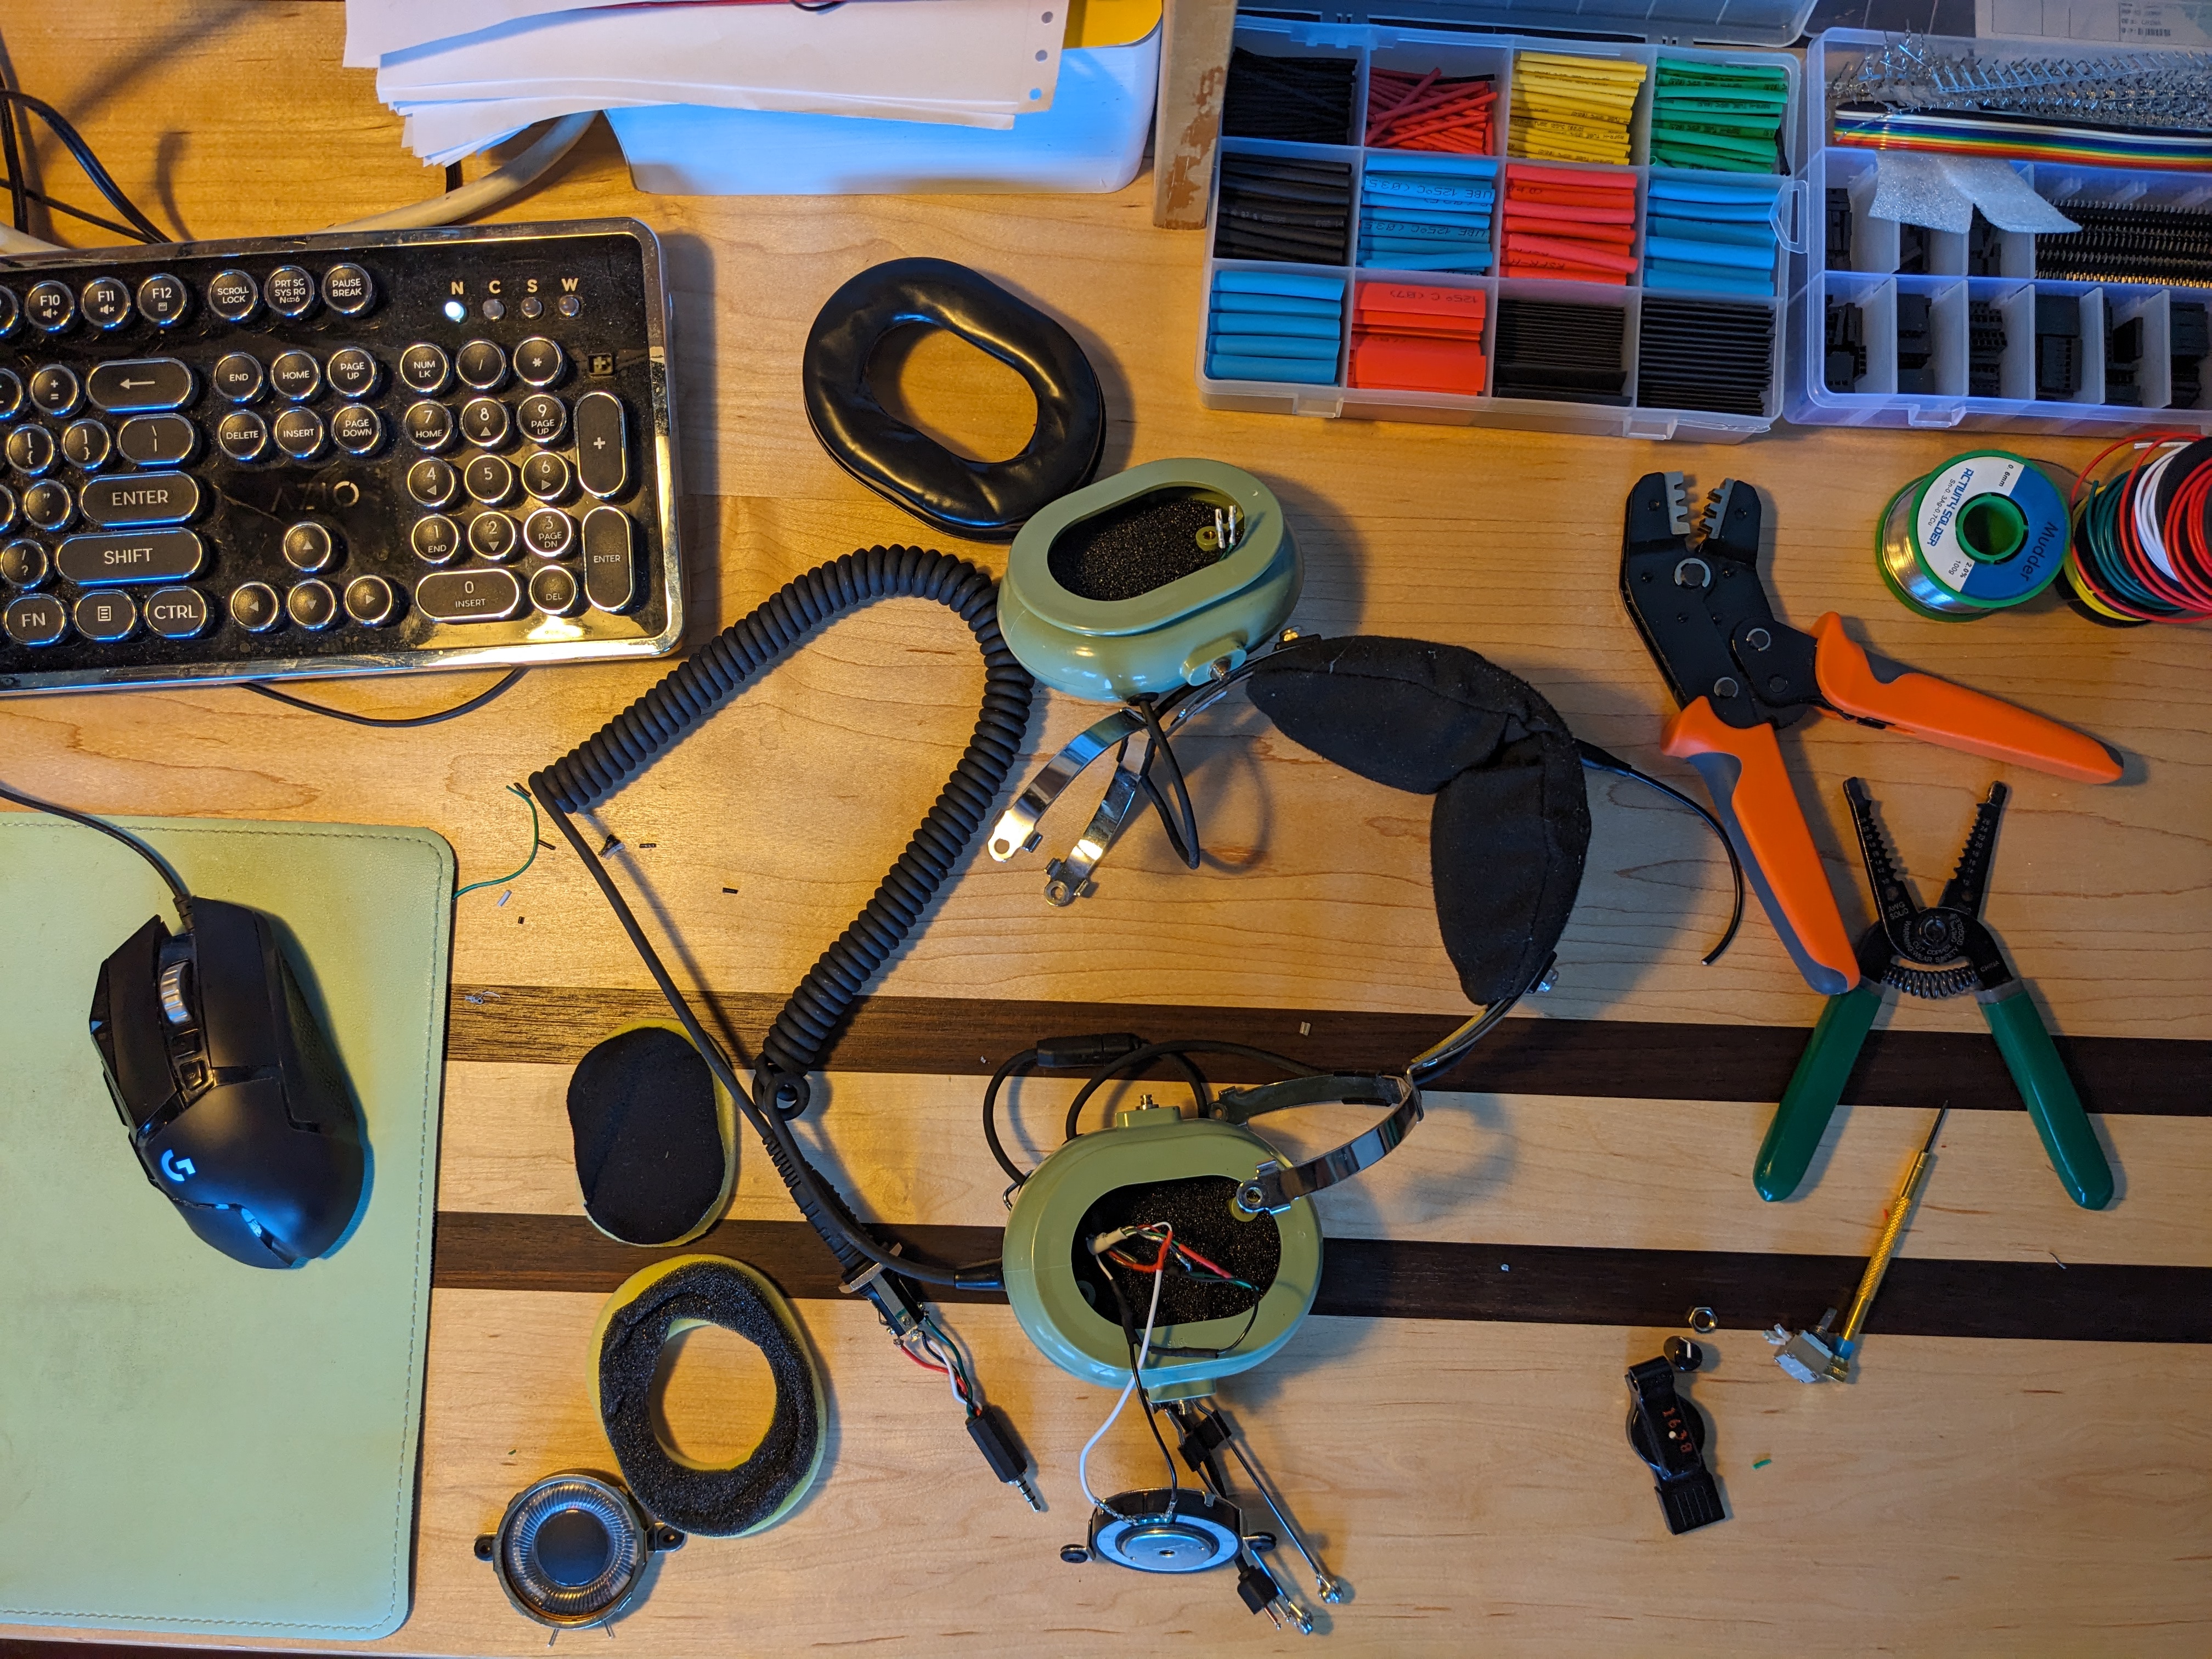
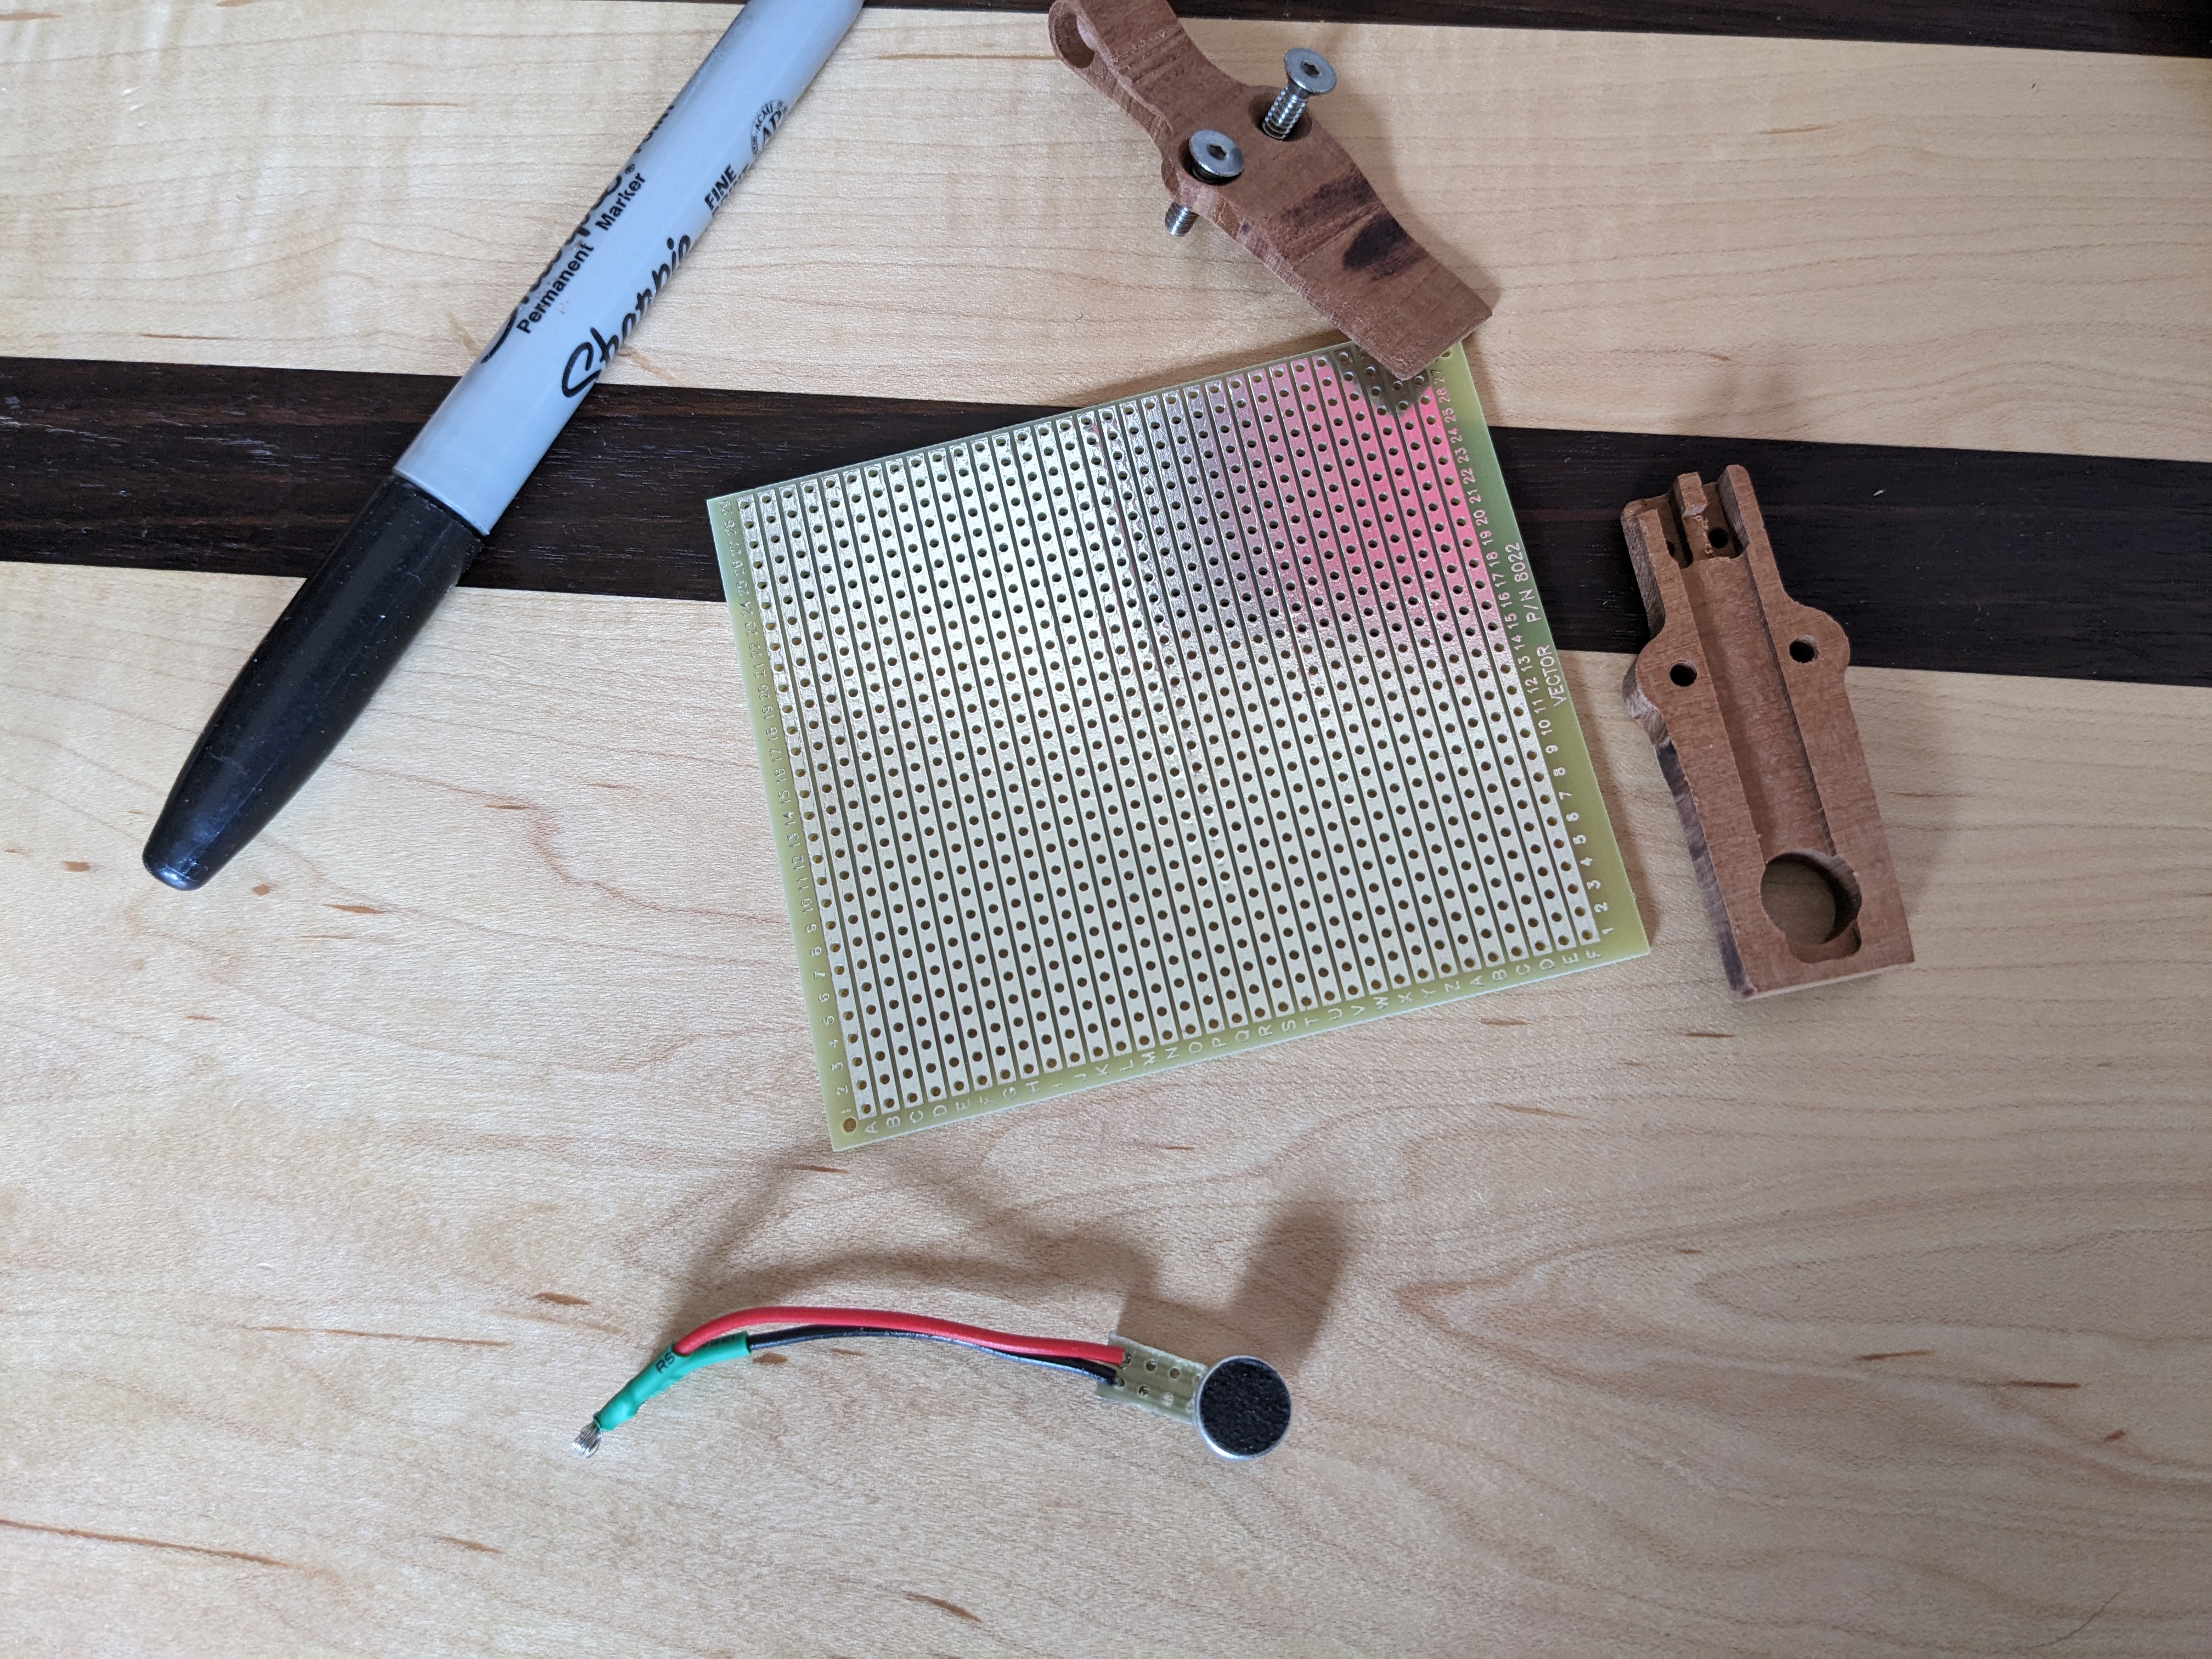
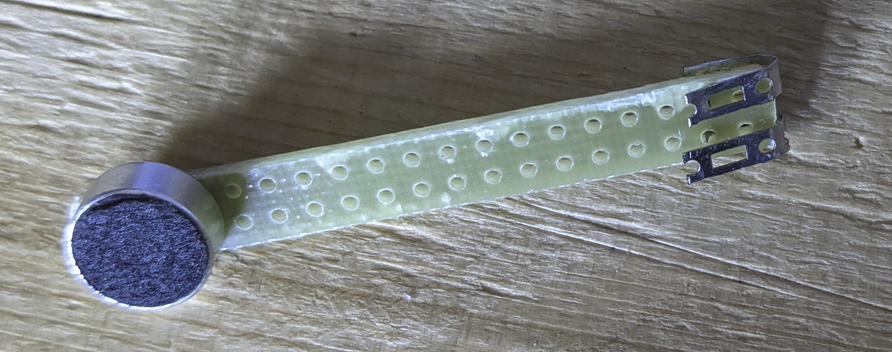
The plan I went with was to make a sort of adapter that will probably always be stuck to the end of the cable. It took some doing (soldering to male 3.5mm coax always taxes my rusty soldering skills). Here it is, pre-casing:
Armed with this adapter, I can then re-wire the rest of the headset in accordance with the following diagram:
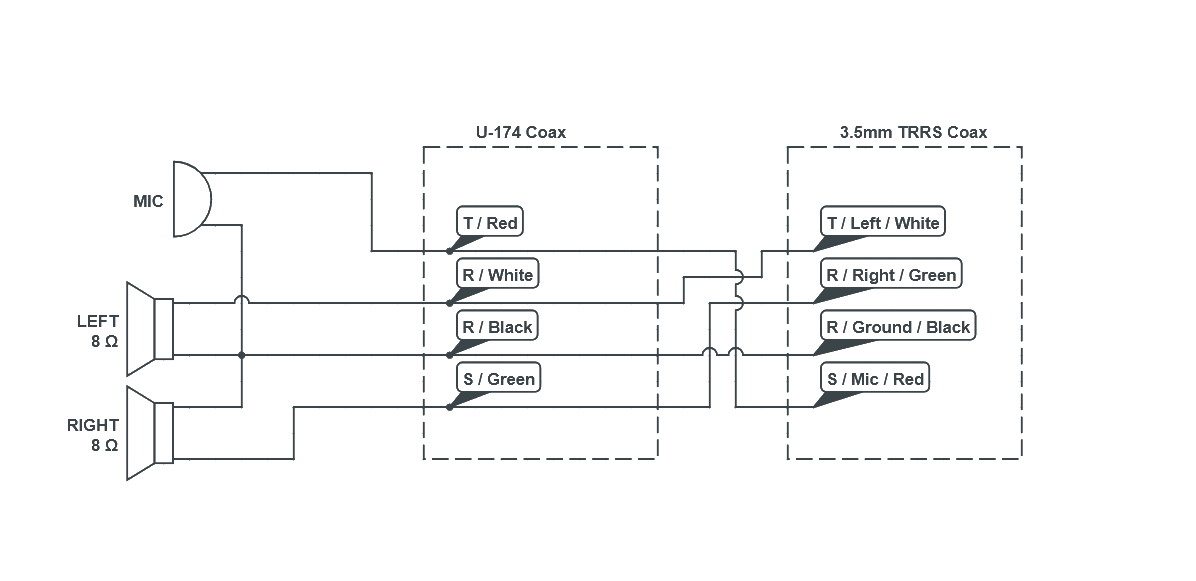
Ignore the mislabeled impedance of the speakers.
Sadly this leaves out the little volume adjusting potentiometer. It has only one channel and therefore can't adjust the volume of two independent audio channels at once. Perhaps one day I can replace it with something like this but in reality I can rely on ubiquitous capability of OS-level volume adjustment.
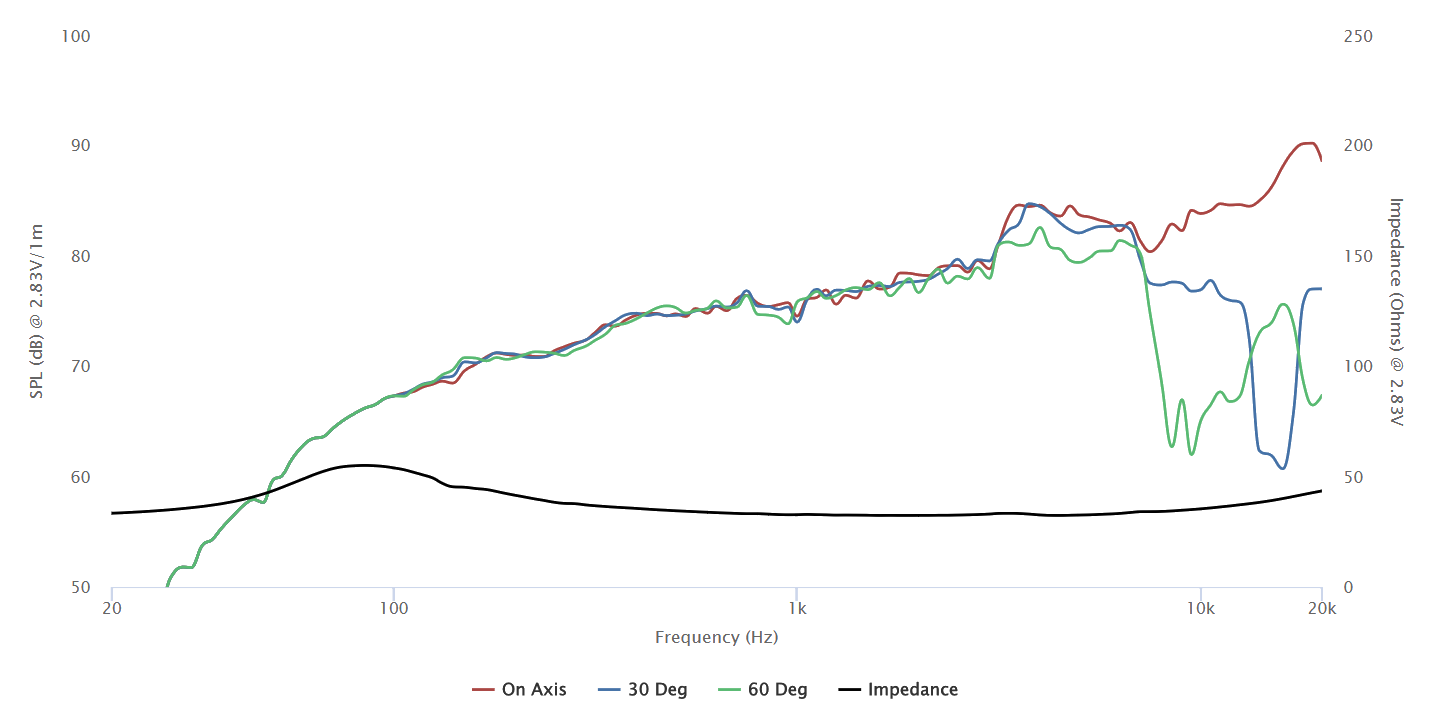
For speakers (or "drivers" as the audio world confusingly calls speakers built for headphones) I chose a seemingly classic DIY headphone driver - the HPD-50N25PR00-32 by Tymphany. These seem to hit the sweet spot of being high enough volume to be cheap ($10 / unit on Digikey) while retaining the quality and documentation of a more high-end product. The datasheet includes a decent frequency response for the things (which is better than a lot of speakers on Digikey!).
The Rebuild
The electrical portion of the rebuild was pretty straightforward. Disassembly was a breeze and the headset provided ample room to work. The new speakers dropped into the old speaker bindings with only slight modification. Soldering wasn't too bad, except for the usual challenge of soldering leads onto a tiny TRRS 3.5mm jack.
Two small facets of the new design took some special effort, however. The weird little adapter I made to shunt the U-174 connector to 3.5mm was both fragile and ugly. It needs a case. And the microphone on my headset didn't seem to work. I didn't have my oscilloscope so I couldn't test whether this was a case of a broken mic (I purchased the headset used) or that the mic simply didn't produce enough signal for my computer's ADC to pick up. Either way, a new microphone was needed and the sole part of the headset that I couldn't easily disassemble was the mic housing. So I needed a new microphone housing as well.
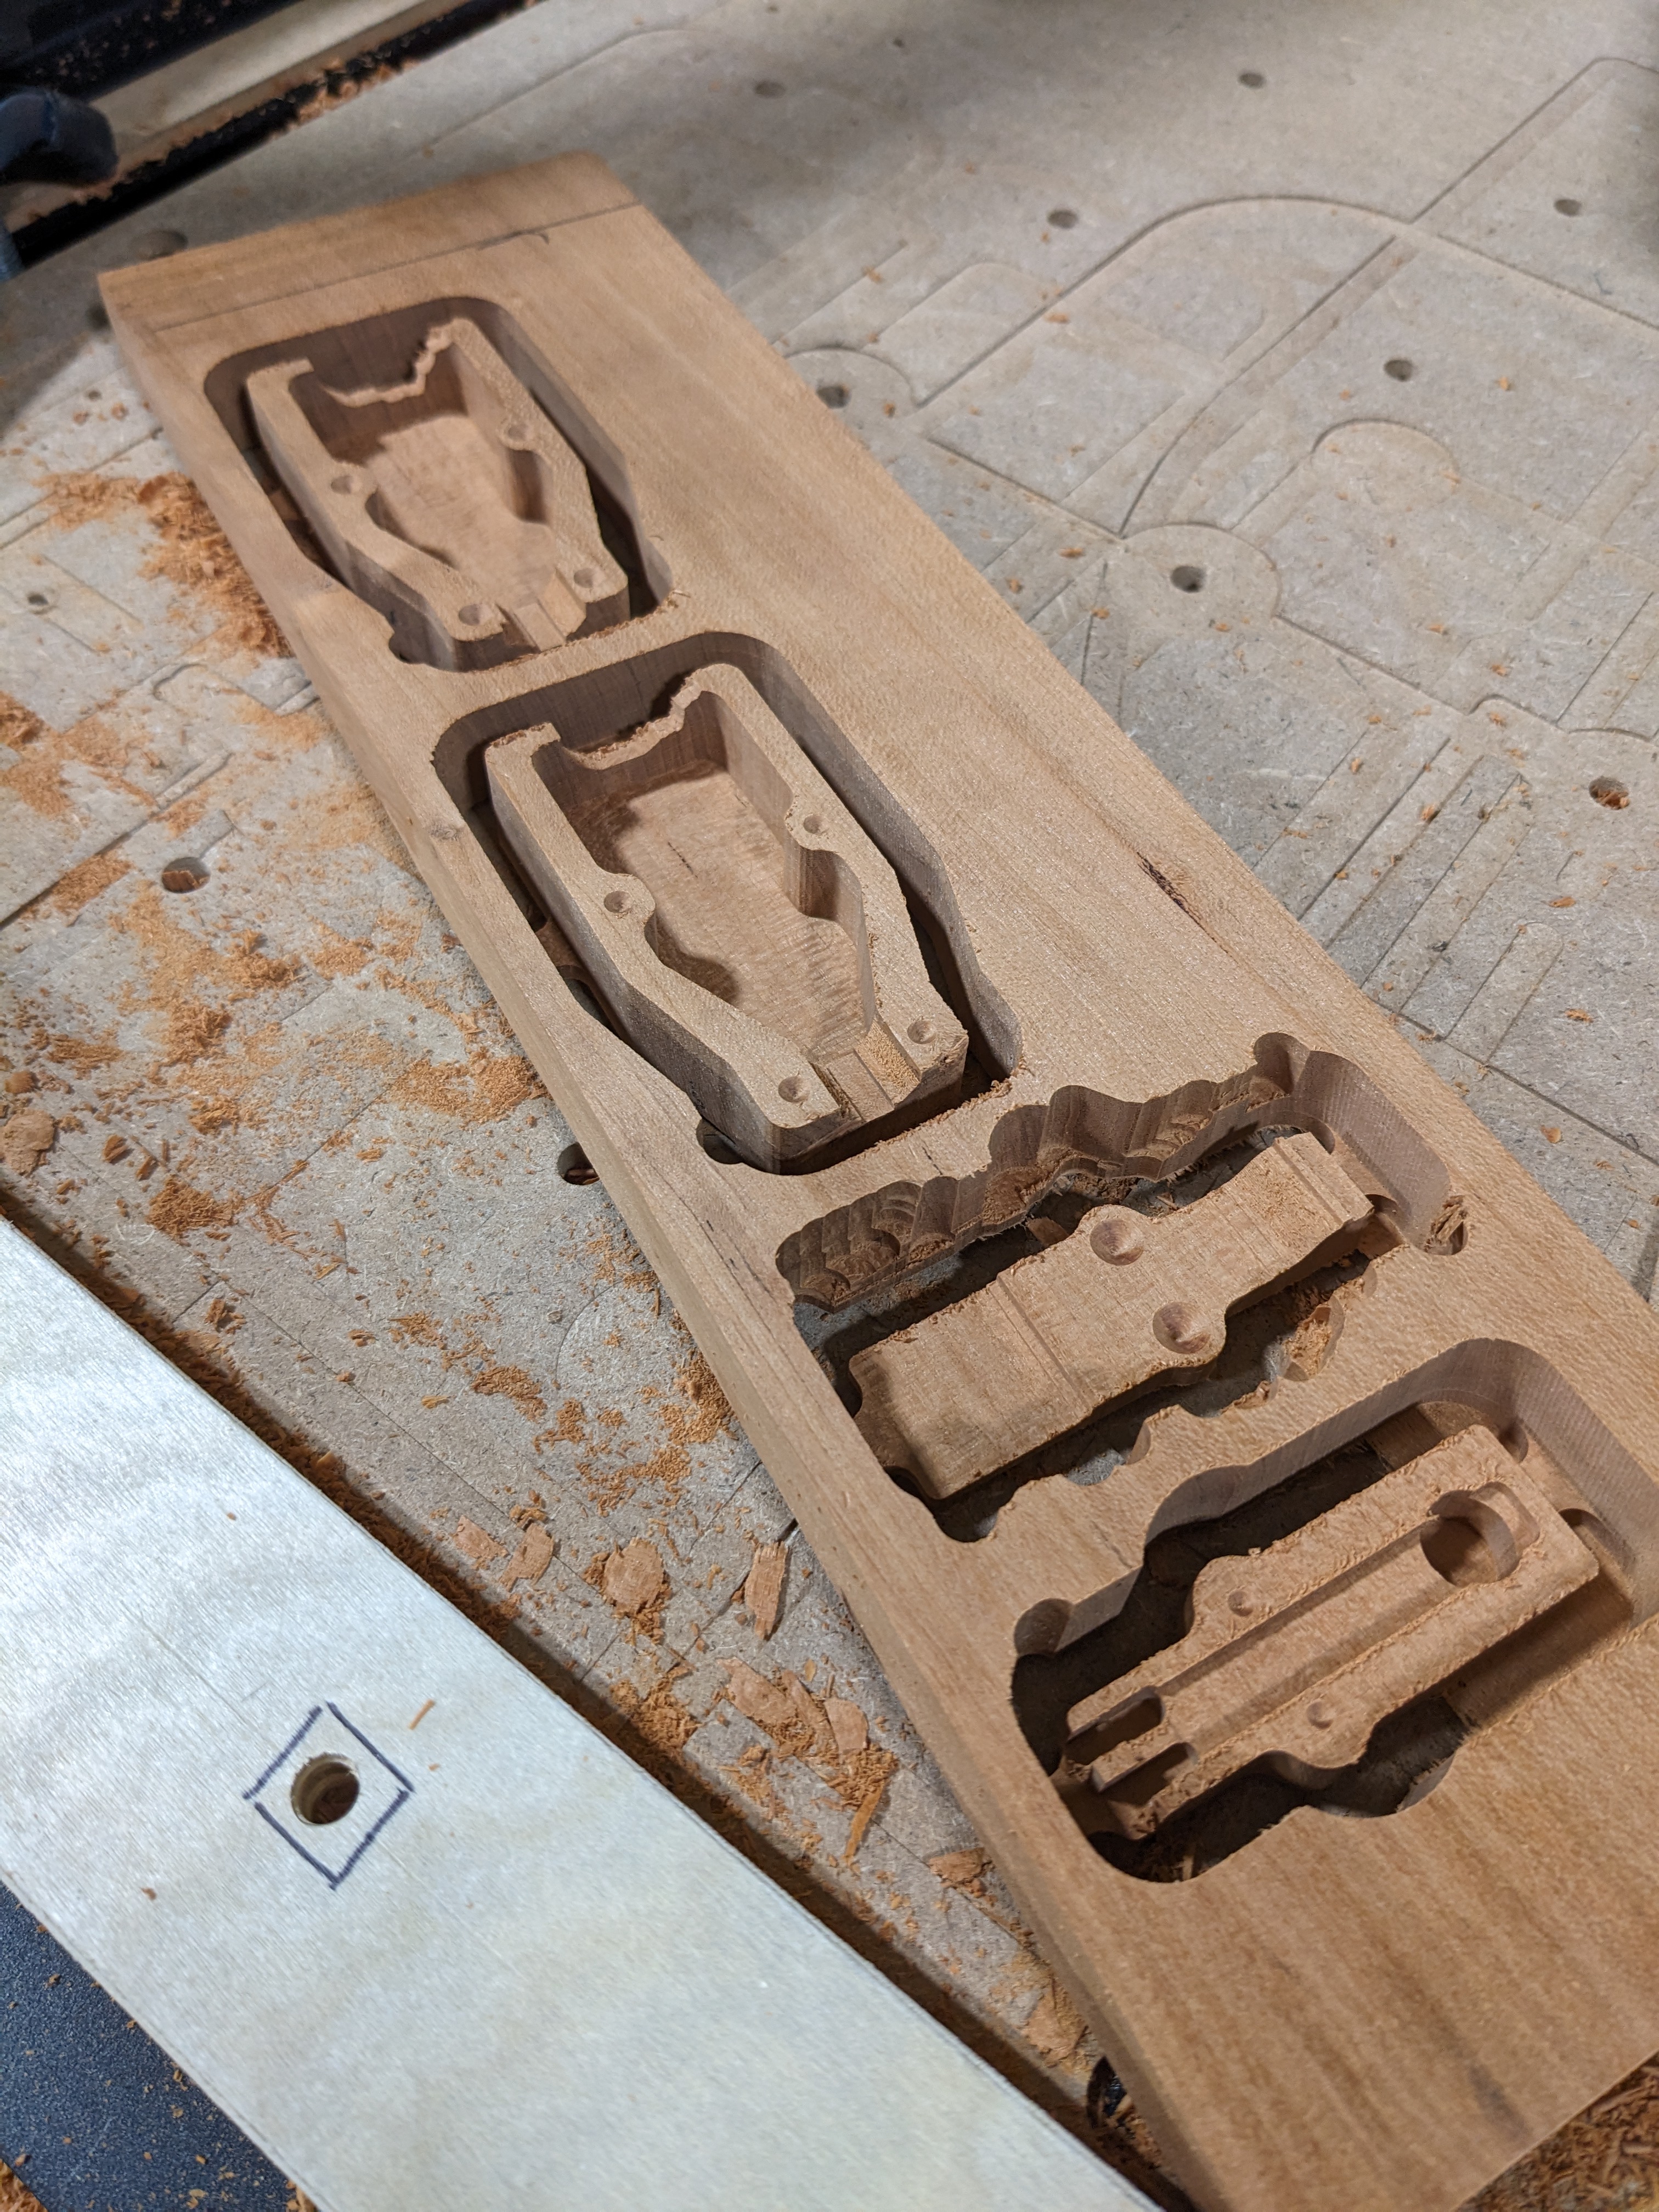
I drafted up a design for these two things in CAD; they are shown below.
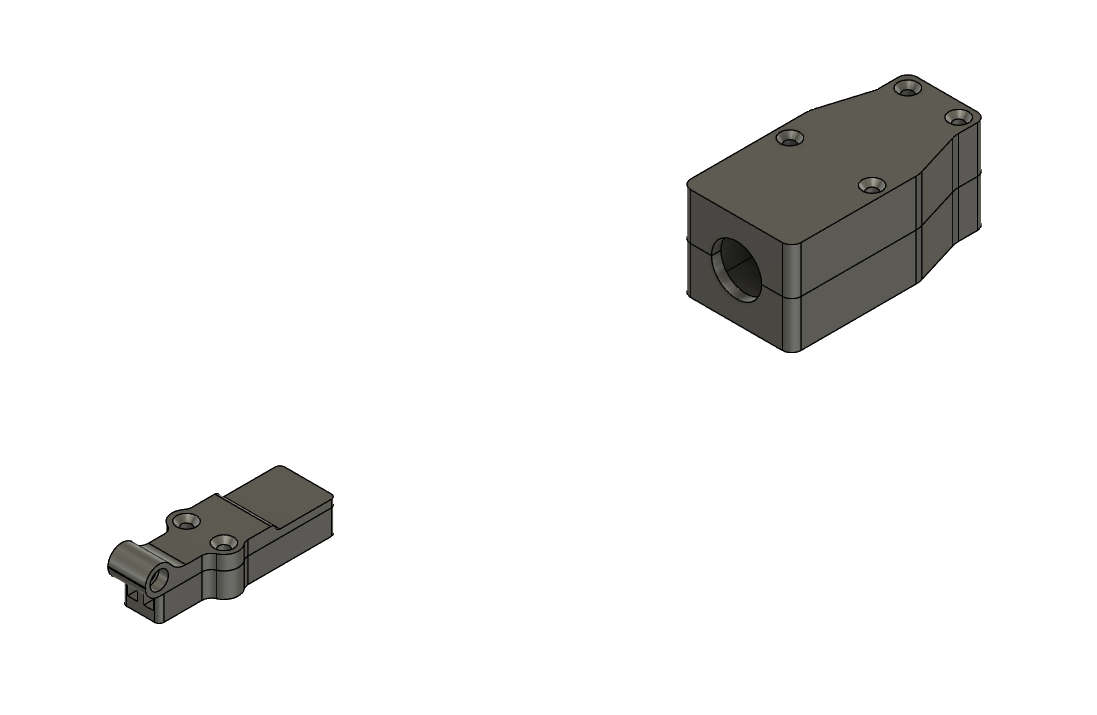
They are both intended to be CNC machined from billet. I chose a nice bit of scrap cherry for these that was originally cut from lumber on my grandfather's land about half a century ago.
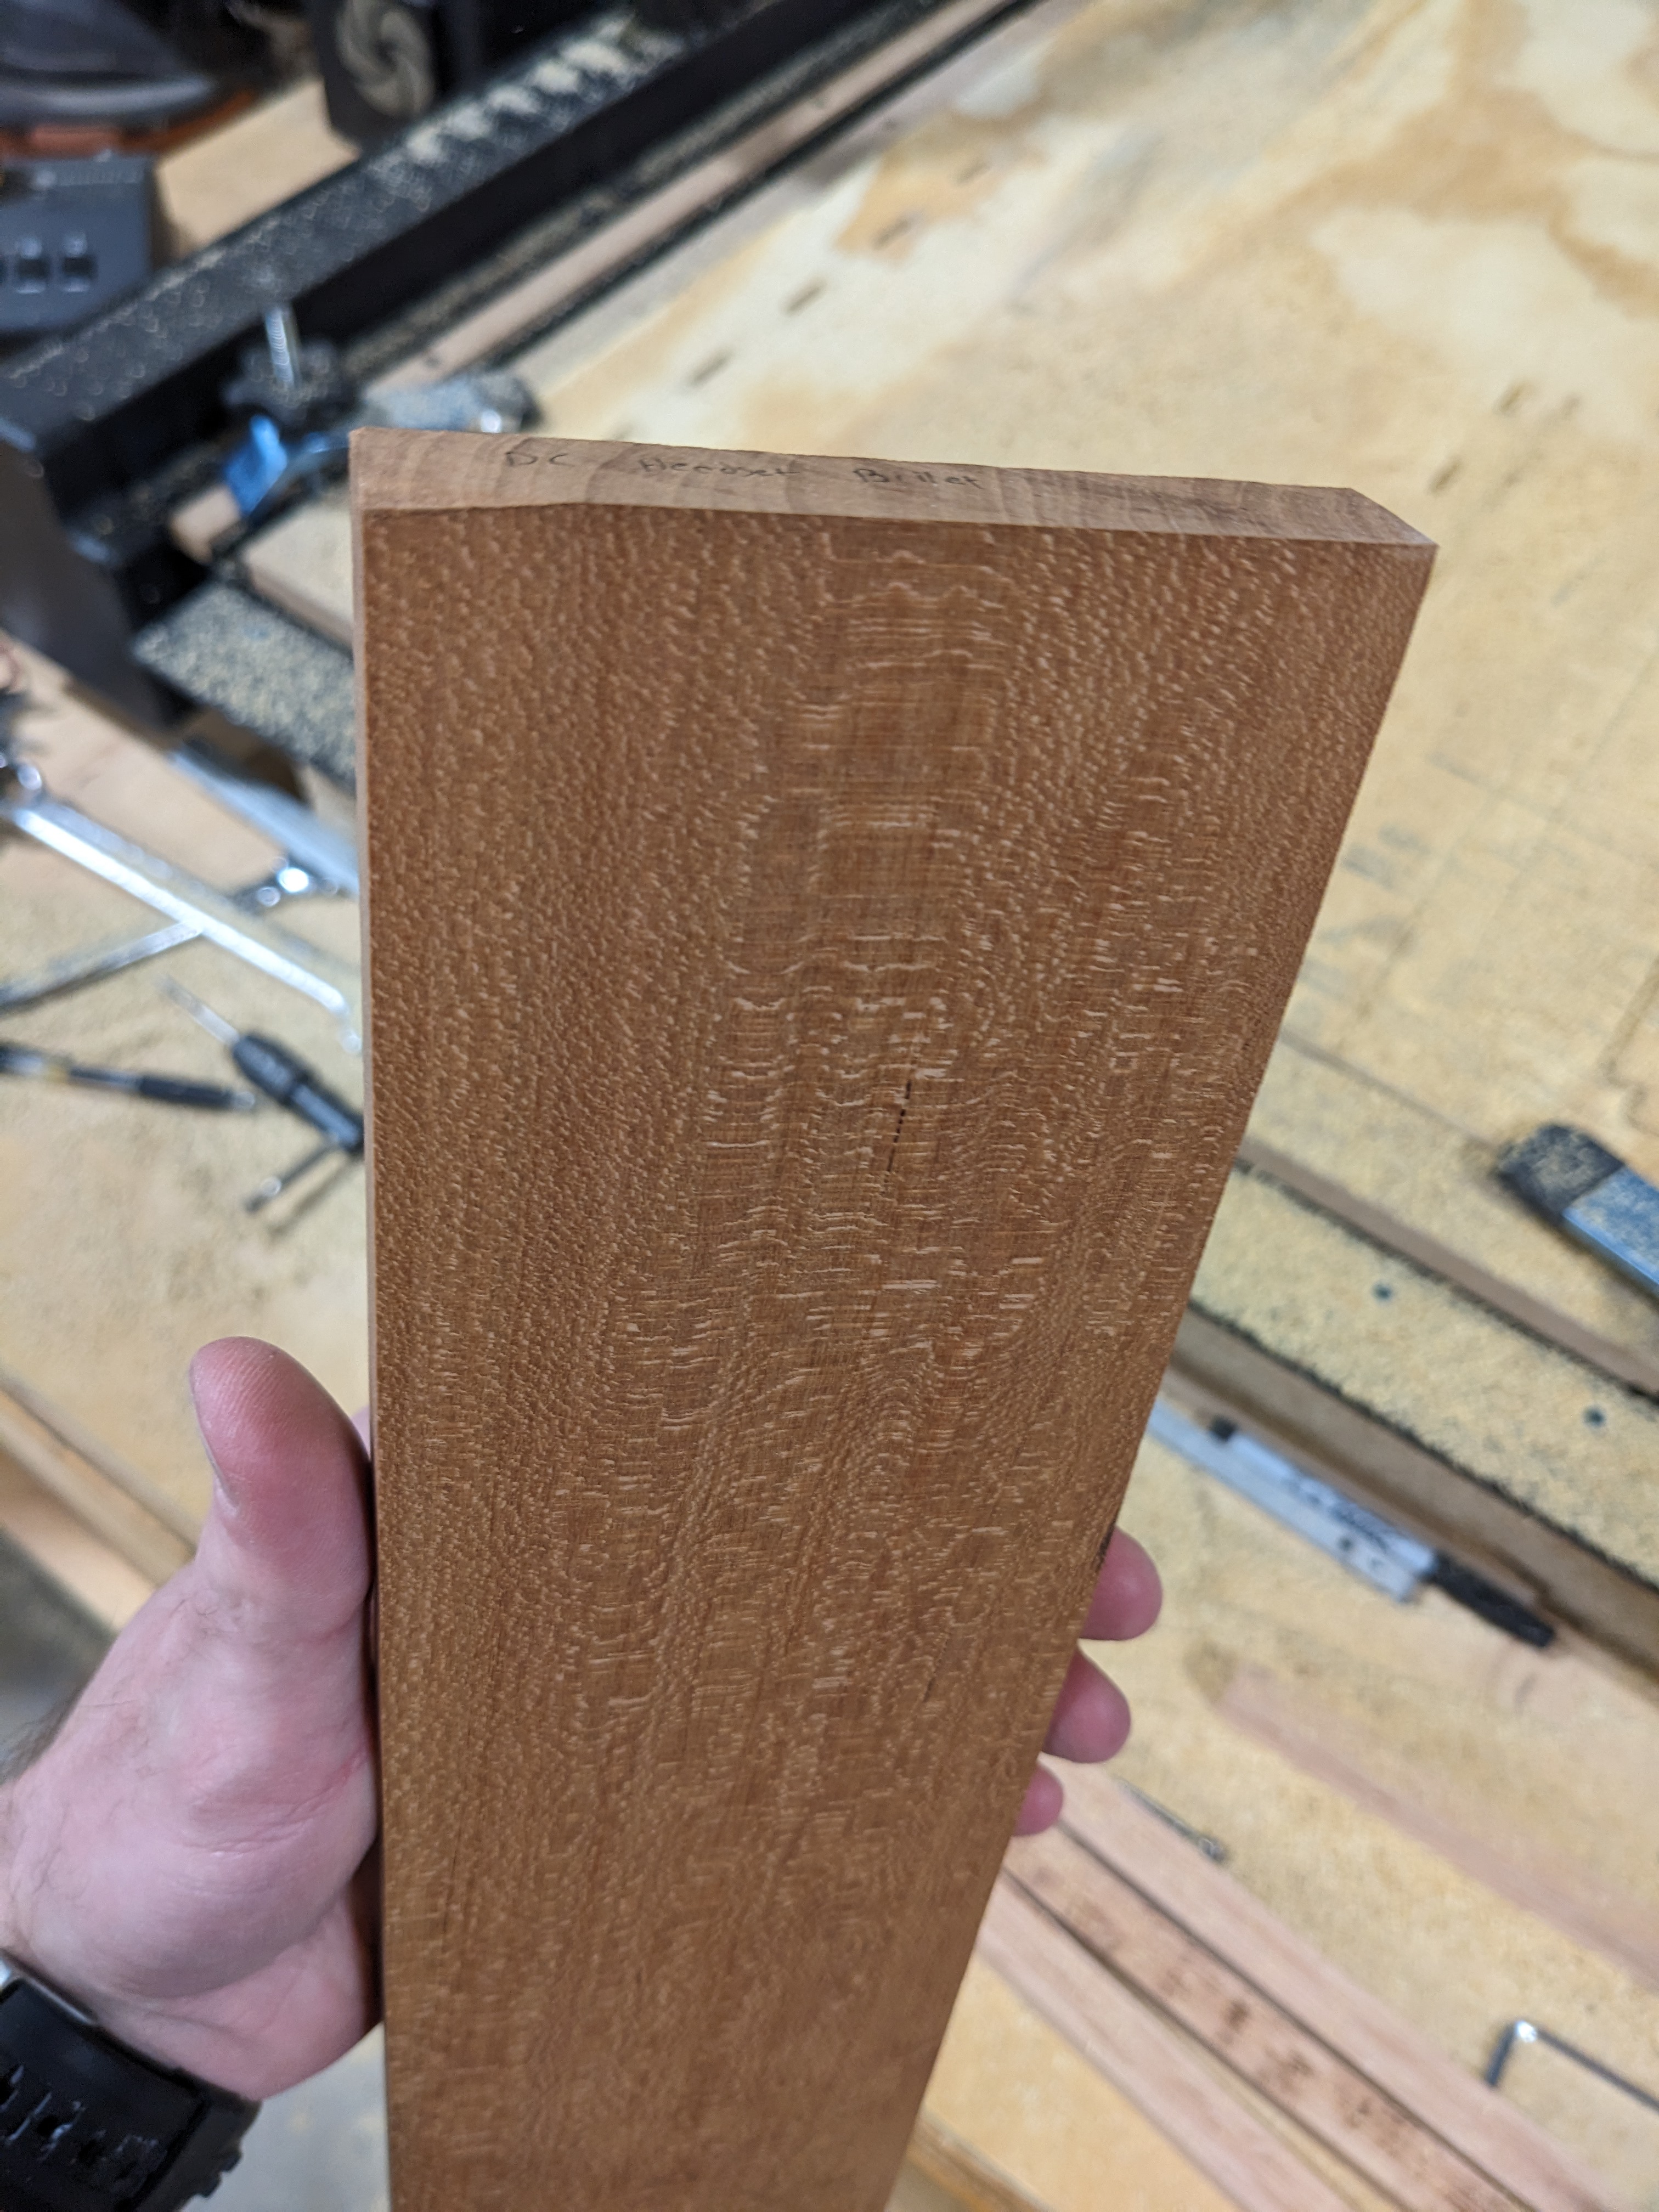
The statue was always in the marble, Michelangelo.
The GCODE for this part was somewhat complex, with three different tools and much 3D geometry. I was a bit too aggressive with some of the cuts and caused some tearout at points, but I'm still mostly pleased with the result. It would have made more sense to 3D print a part like this, but I've been doing alot of work with billet lately and figured I'd see how far I could push wood as a material.
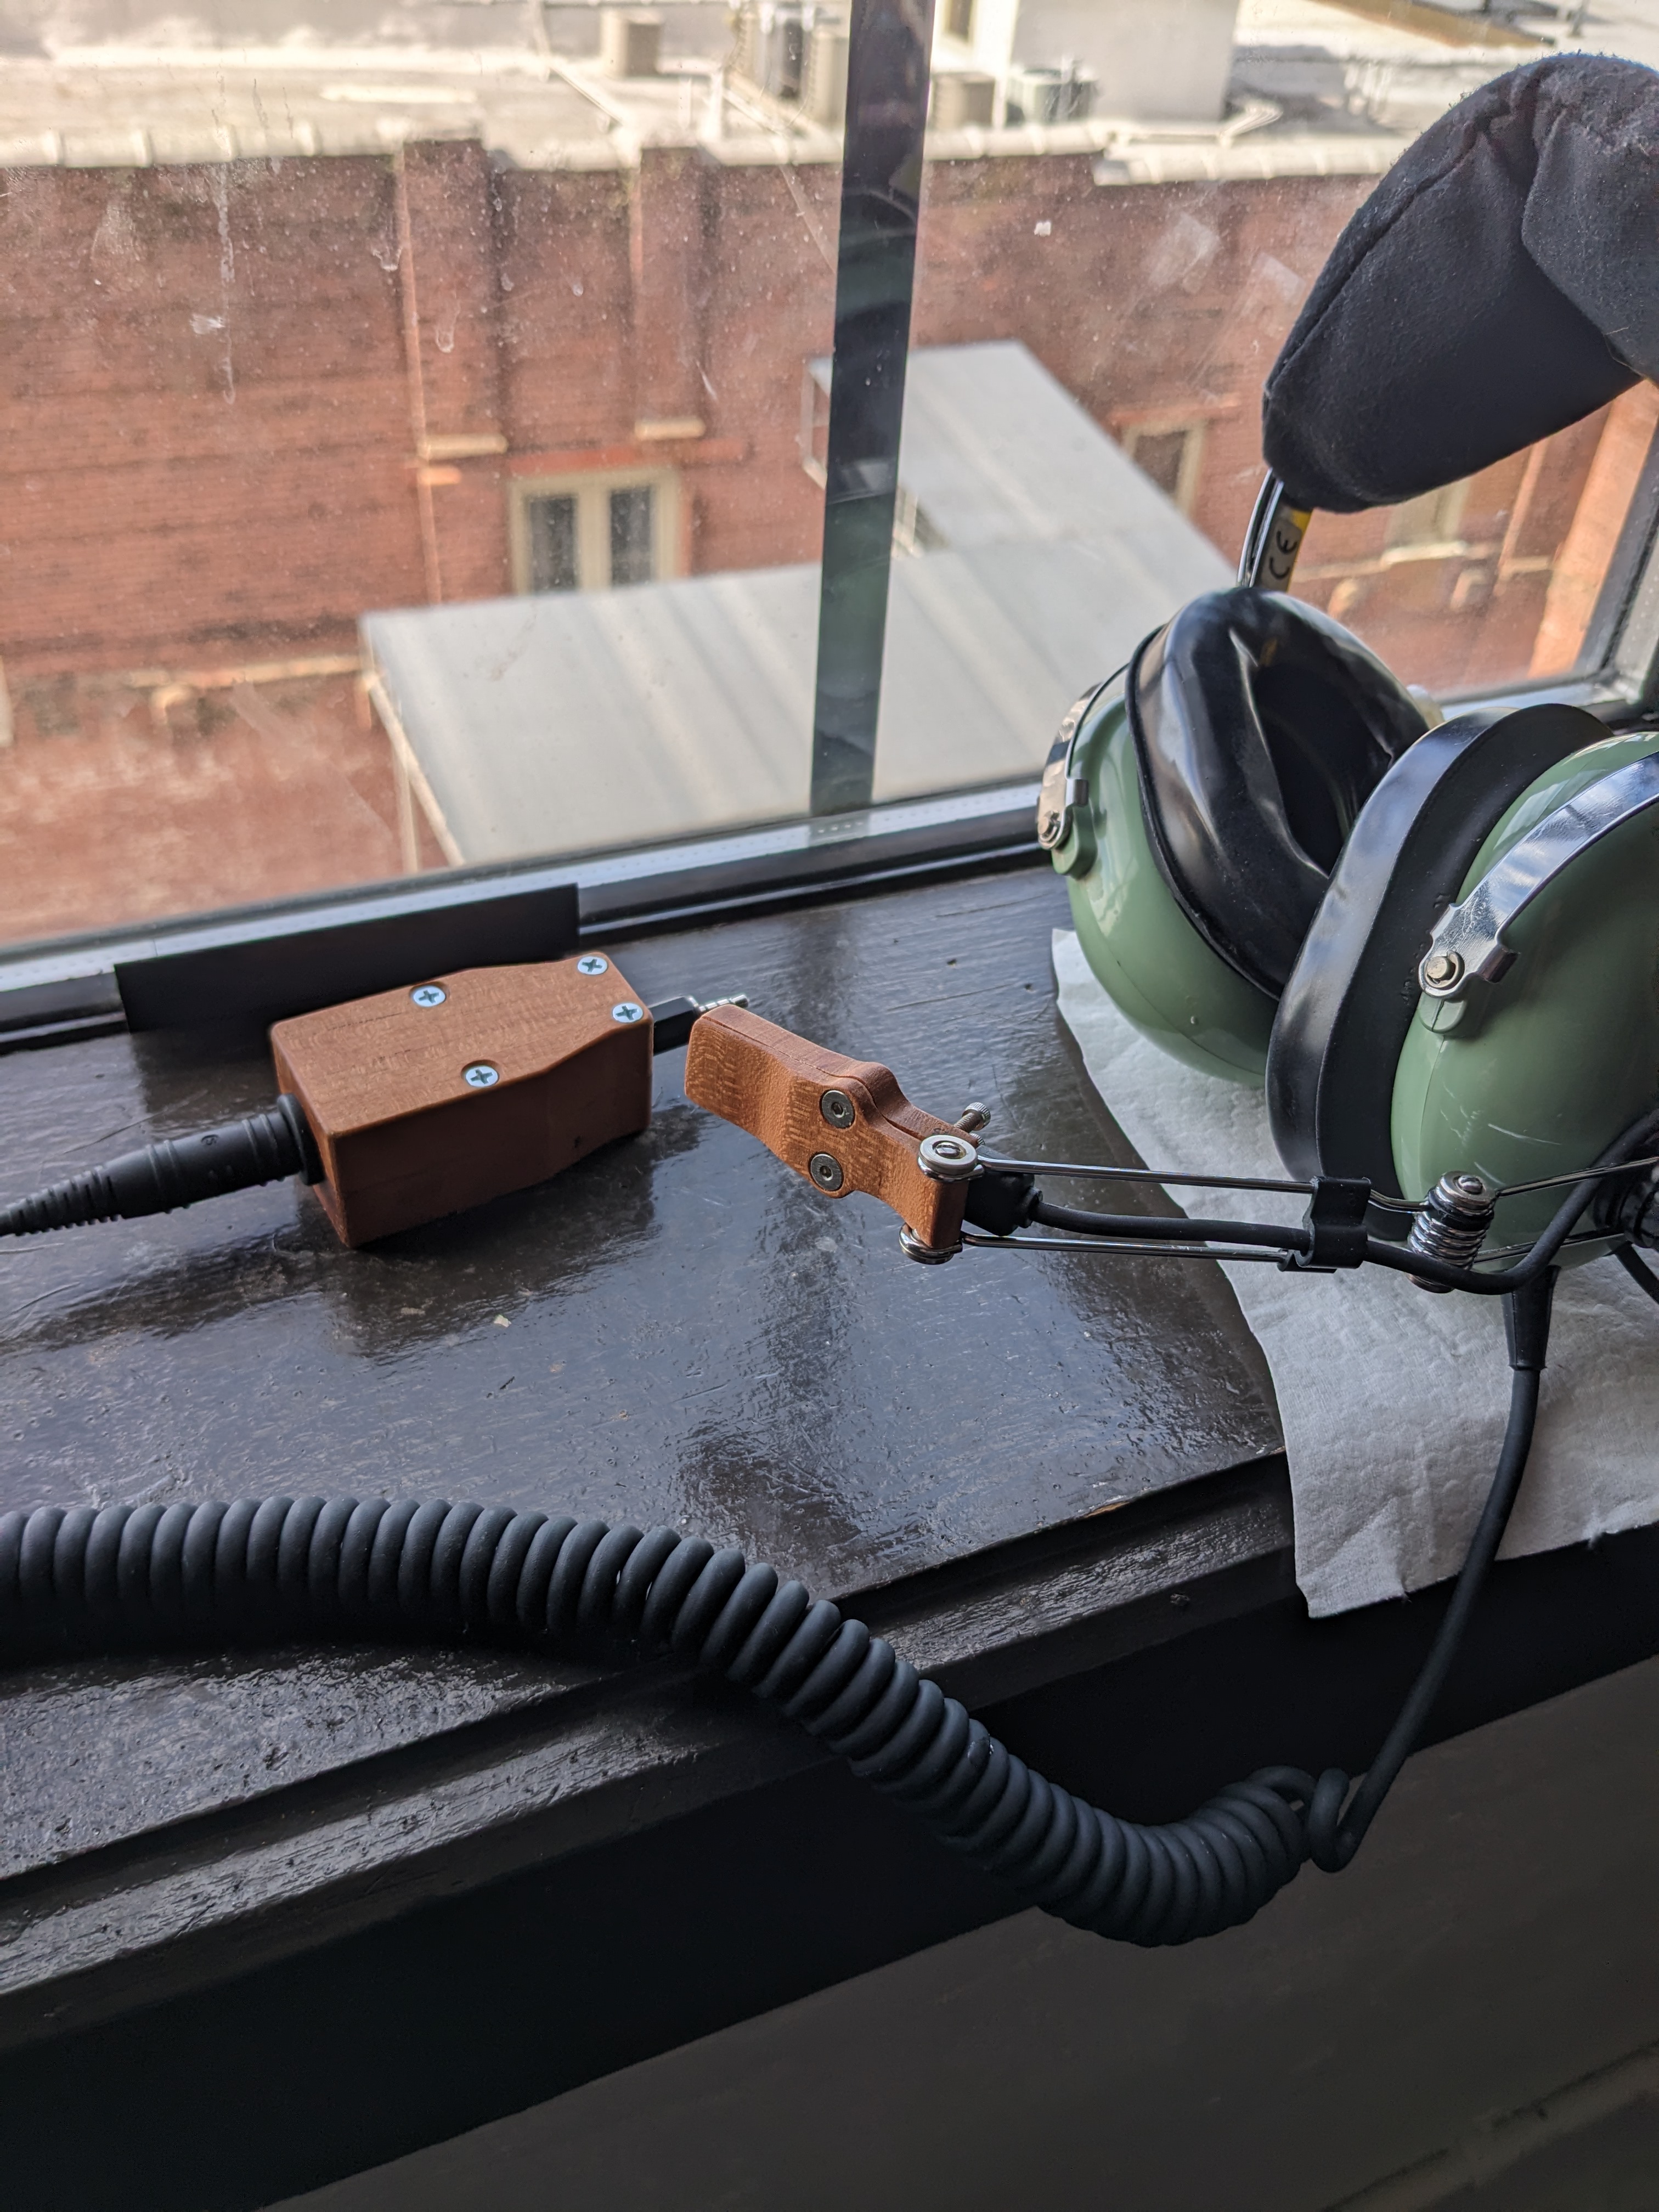
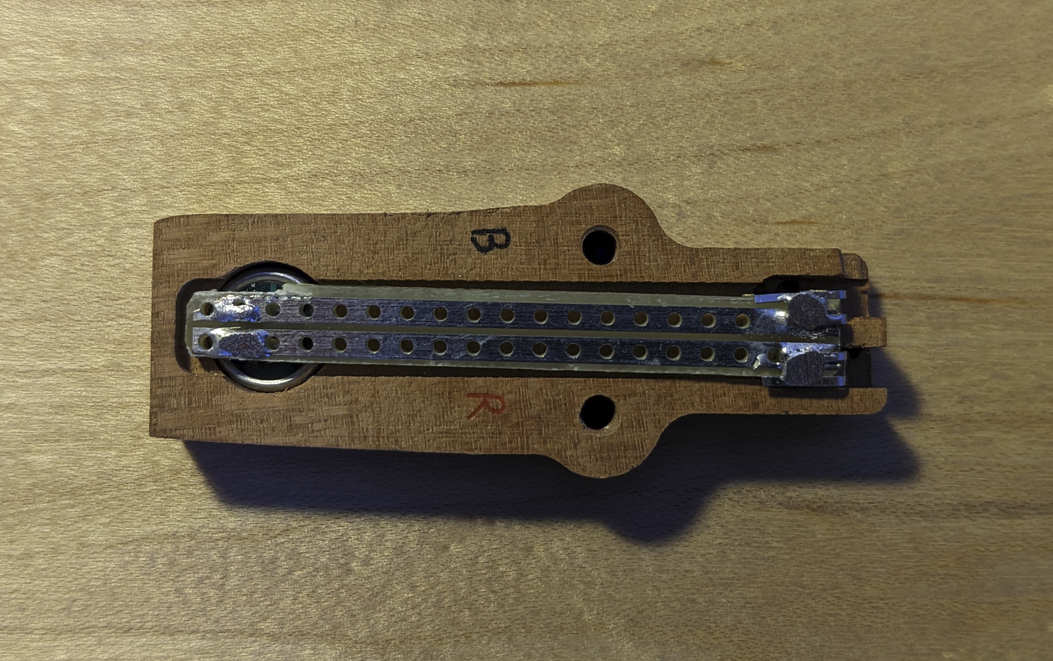
Assembly for the coax adapter block was really simple - I just dropped the cable assembly straight in and fastened the thing together. Some sanding and finishing with Minwax's euphemistic "tung oil" has it looking fine.
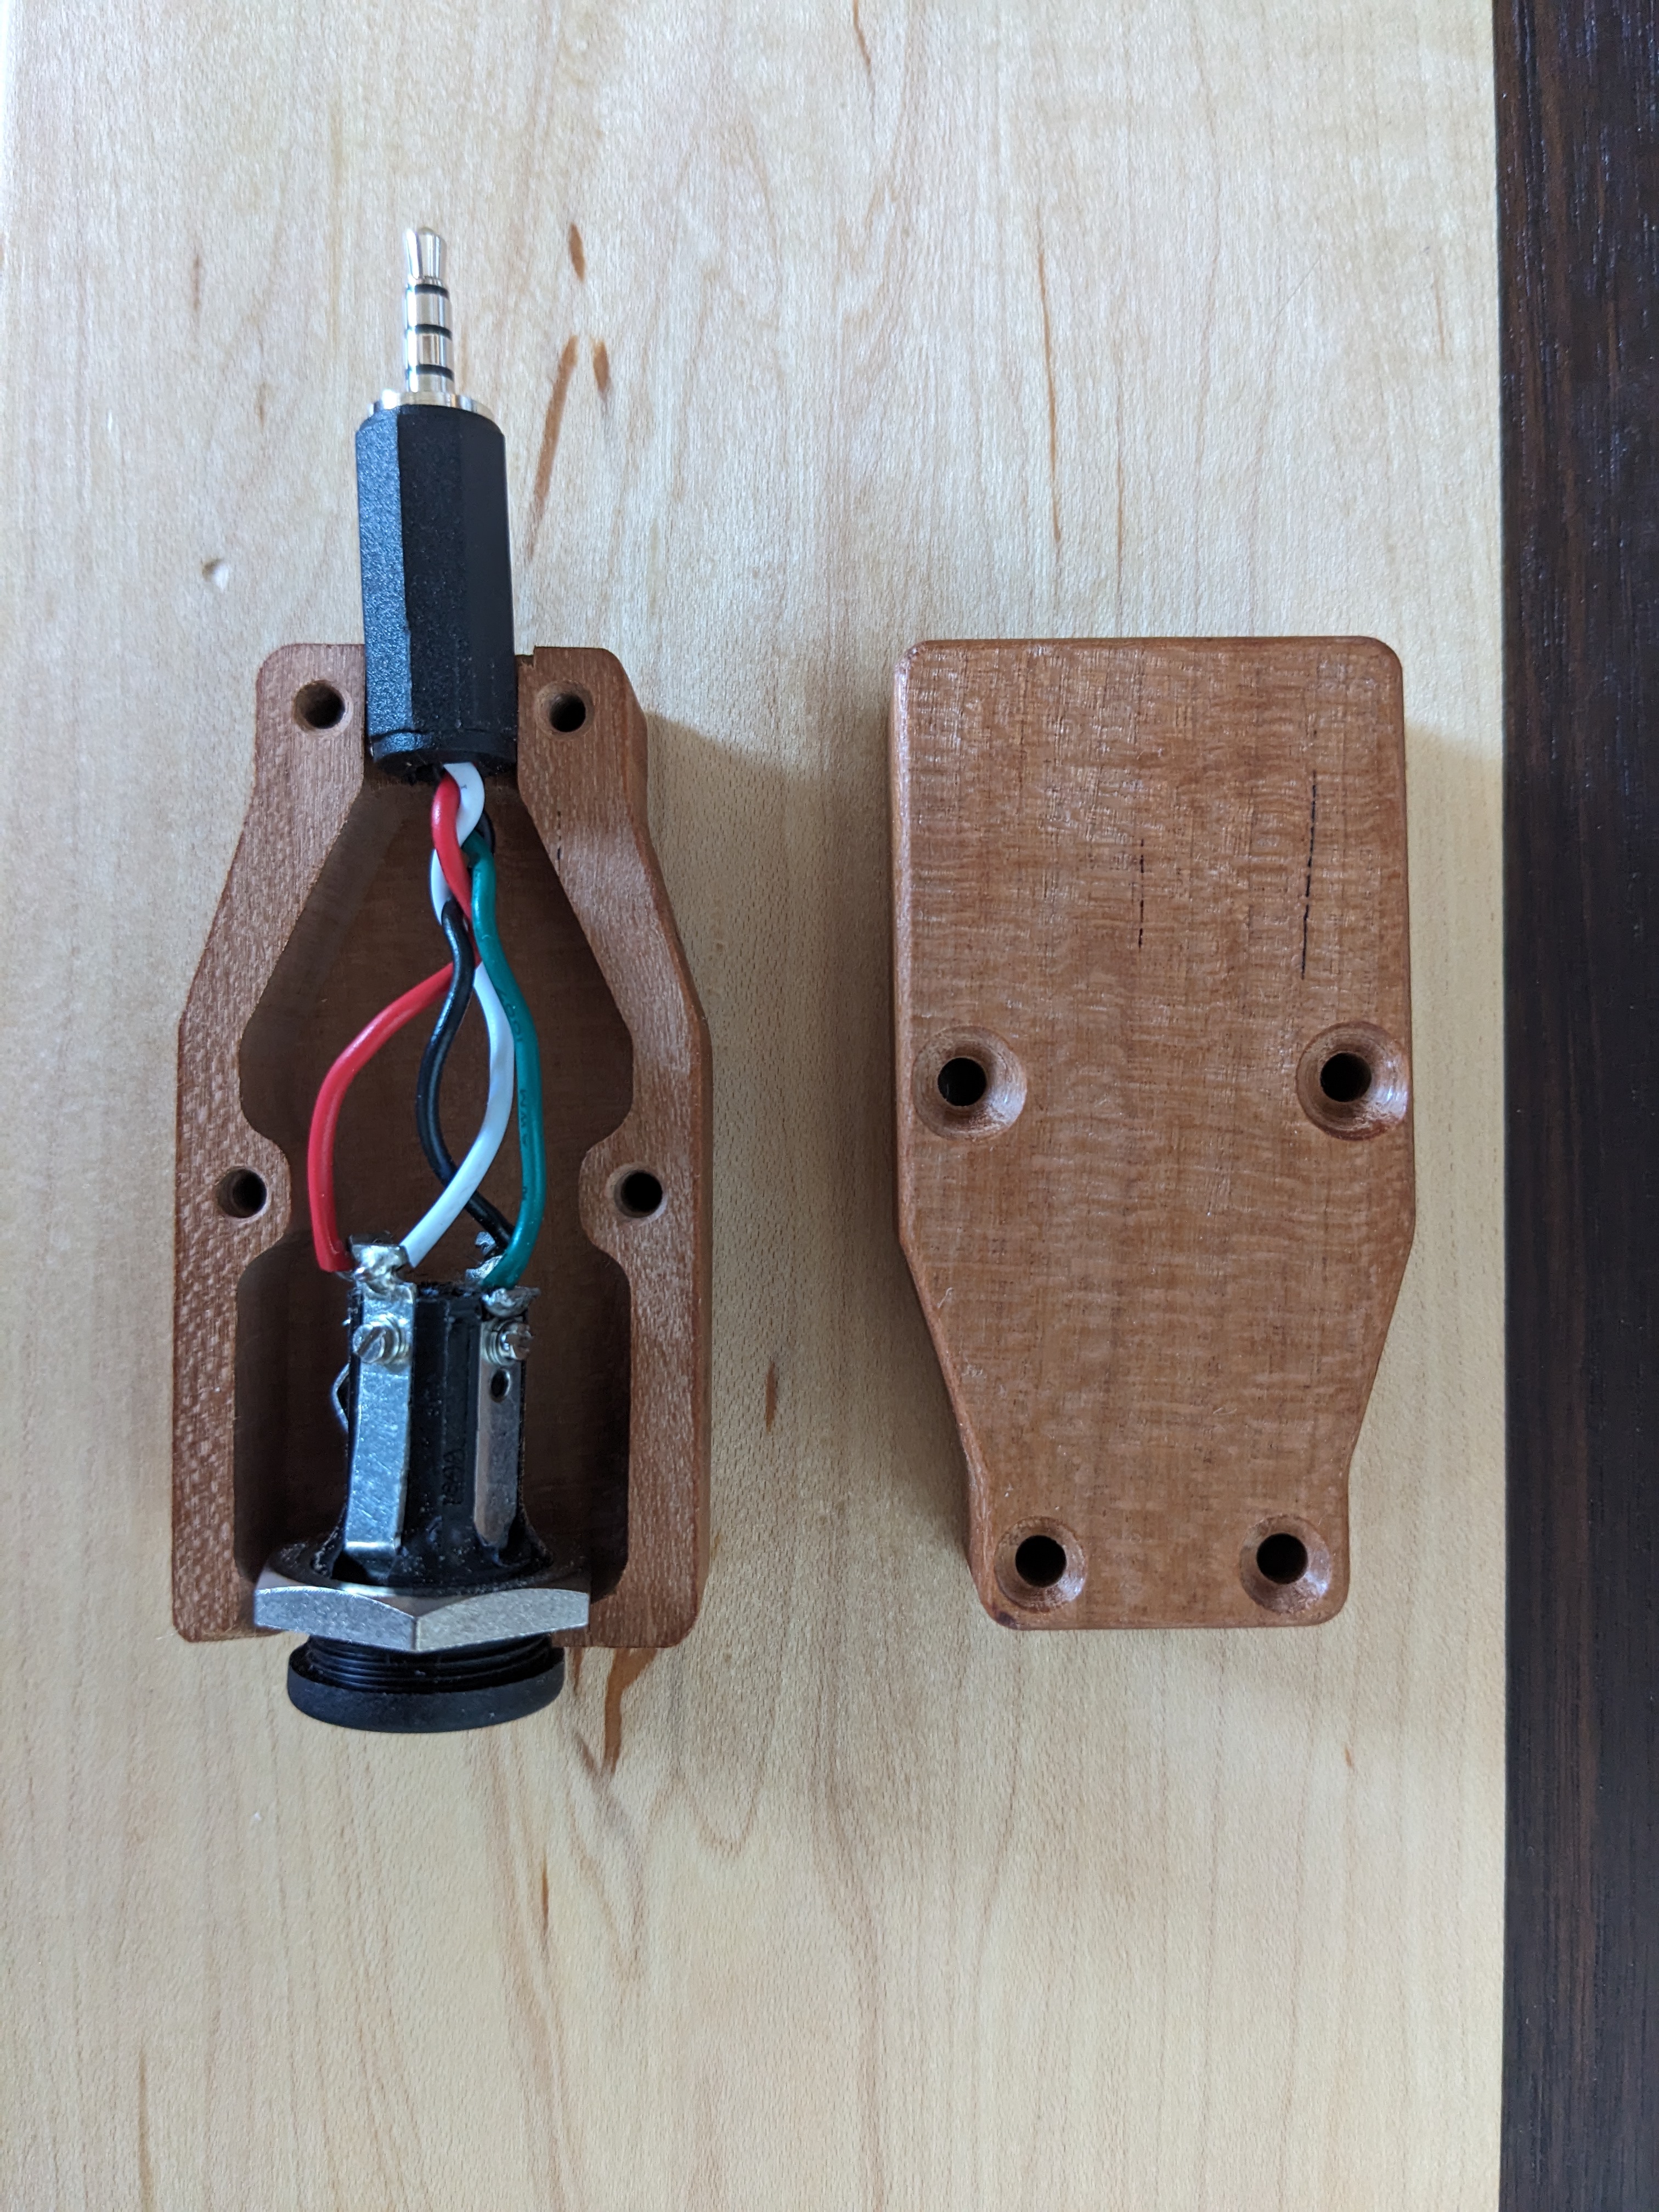

The adapter block assembled and completed.
The microphone block was a tad more complex. I wanted to preserve the original banana plug screw-lugs of the original block design. I used some old stripboard as a base and soldered some scrap bits onto one end to form springy contact plates for the banana plugs. It was something of a rough job, but nothing copious filing couldn't bring back into square. The resulting piece fit quite nicely, proving the old adage that "you can make anything in the world with a file except a profit". The block fit nicely together in the end despite my best attempts to destroy it with a belt sander.
The Result
I was pleased to discover that both electrically and mechanically the rebuild worked first try. After all, this was a relatively minor alteration. I find the audio quality to be pretty decent, given that I didn't alter the foam packing for proper acoustics at all. There's just a little something lacking in a playback of the fourth movement of Suite Gothique Op. 25 that I suspect is being absorbed straight into the foam.
Fortunately, this headset is a great place to play around with acoustics and wiring. I've got extra space in the adapter block for circuitry, so I imagine I'll return to this headset when I've some time to open an acoustics textbook.
Appendix A: References
Here are some reference documents and parts, for my own convenience and perhaps even for others'.
- Parts and Wiring
- H10-76 Exploded view, parts list, and wiring diagram from David Clark.
- Datasheet
- H10-76 Datasheet from David Clark.
- HDP 50N25 Datasheet
- Peerless HDP 50mm Speaker / Driver Datasheet.